Kompletter Online-Schuhmacherkurs
Vom Anfänger zum Schuhmacher – mit Schritt-für-Schritt-Lektionen, die dich durch den gesamten Prozess führen – vom Design bis zum fertigen Paar.
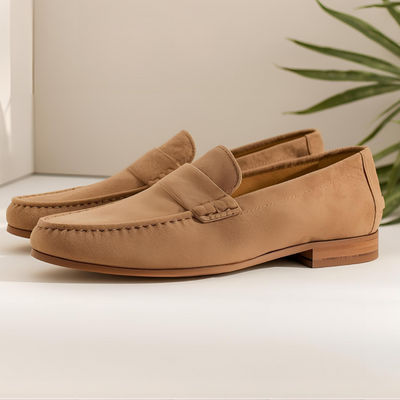
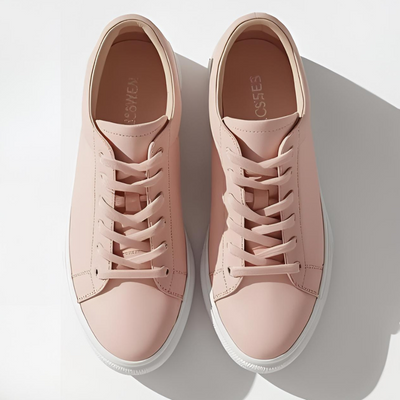
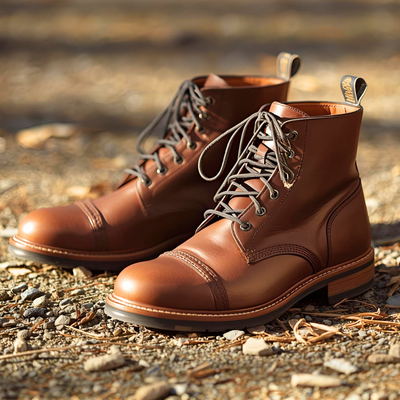
- Lerne, Schnittmuster für alle ikonischen Schuhmodelle zu erstellen: Oxford, Derby, Loafer, High Heels, Sneakers, Sandalen, Ballerinas, Stiefeletten & Stiefel.
- Lerne, jedes Schuhmodell mit verschiedenen Methoden anzufertigen – von der geklebten Machart bis zur Stitchdown-Konstruktion.
- Lerne, professionelle Finishing-Techniken im Schuhmacherhandwerk anzuwenden.
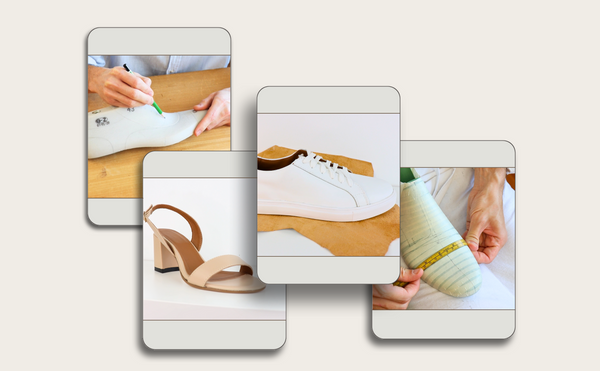
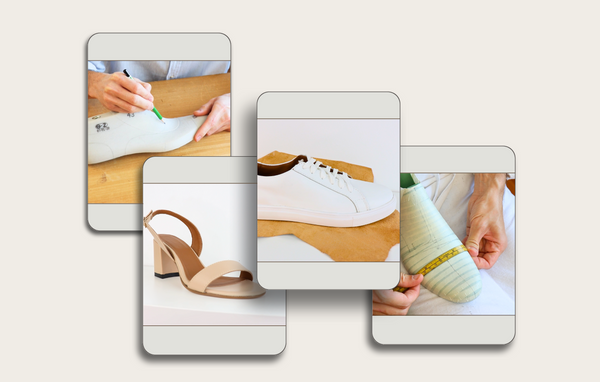
Lernen Sie Schritt für Schritt das Schuhmachen von Grund auf mit dem kompletten Online-Kurs von VALEVRO. Werkzeug und Schuhleisten inklusive. Jetzt anmelden!
Was Sie lernen werden
In diesem Kurs erkunden Sie Schritt für Schritt den Prozess der Schuhherstellung von Anfang bis Ende.
Sie erfahren Folgendes:
-
Erstellen Sie Muster für Oxford, Derby, Loafer, High Heels, Sneakers, Sandalen, Ballerinas, Stiefeletten und Kalbsstiefel
-
Verstehen Sie die Anatomie und Leistenvorbereitung von Schuhen
-
Schneiden, montieren und konstruieren Sie jeden Schuh von Hand
-
Wenden Sie die von professionellen Schuhmachern verwendeten Veredelungstechniken an
Am Ende des Kurses sind Sie in der Lage, jedes Schuhmodell selbstbewusst zu entwerfen, zu mustern und von Hand herzustellen.
Im Leistungsumfang enthalten
Wenn Sie sich anmelden, erhalten Sie nicht nur Zugang zu fachkundiger Anleitung, sondern auch ein komplettes Schuhmacher-Werkzeugset, das Ihnen direkt nach Hause geliefert wird.
In Ihrer Kursanmeldung enthalten:
✅ Ein Paar professionelle Schuhleisten (in der von Ihnen gewählten Größe)
✅ Hochwertige Schuhmacherwerkzeuge
✅ Wichtige Materialien für die Schuhherstellung
✅ Lebenslanger Zugriff auf alle Lektionen und zukünftige Kursaktualisierungen
✅ Zugriff auf 9 komplette Schnittmuster- und Schuhmacherprojekte
✅ Support über unsere Studenten-Community und E-Mail
Wir liefern Ihnen Ihr Werkzeug und Ihre Leisten direkt bis vor die Haustür – damit Sie sofort mit dem Basteln beginnen können.
Warum Valevro wählen?
Bei Valevro unterrichten wir nicht nur – Sie gestalten. Unser Kurs wurde speziell für angehende Kunsthandwerker und zukünftige Schuhdesigner entwickelt.
Aus diesen Gründen vertrauen Studenten aus aller Welt Valevro:
-
🧠 Alle Fähigkeitsstufen willkommen – keine Erfahrung erforderlich
-
🧰 Lernen durch Tun – bauen Sie echte Schuhe von Anfang bis Ende
-
🎓 Fachkundige Anleitung – basierend auf jahrelanger Erfahrung im professionellen Schuhmachen
-
🌍 Globaler Zugriff – nehmen Sie von überall aus am Kurs teil, ganz nach Ihrem Zeitplan
-
🎁 Kostenlose Werkzeuge und Leisten – alles, was Sie für den Beginn Ihrer Reise benötigen
Im Gegensatz zu anderen Kursen liegt der Schwerpunkt unseres Kurses darauf, Ihnen wiederholbare Techniken auf professionellem Niveau zu vermitteln, die Ihnen ein Leben lang erhalten bleiben.
Egal, ob Sie davon träumen, Ihre eigene Linie auf den Markt zu bringen oder einfach nur Schuhe für sich selbst herzustellen – dies ist Ihr Anfang.
Referenzen
Unsere Schüler verwandeln ihre Leidenschaft in Können – Paar Schuhe nach Paar. Das sagen sie:
„Ich hatte keinerlei Erfahrung, aber ich habe innerhalb weniger Wochen mein erstes Paar Slipper gemacht. Die Anleitungen sind super klar und die Muster sind Gold wert.“
— Anna T., USA
„Ich habe mich sehr gefreut, mein Toolkit per Post zu bekommen! Alles ist so gut erklärt und jetzt fühle ich mich sicher, meine eigenen Stile zu entwerfen und zu machen.“
— Jake M., Großbritannien
„Das ist der umfassendste Schuhmacherkurs, den ich gefunden habe. Er führt Sie wirklich von A bis Z.“
— Louise R., Frankreich
✨ Bereit, Ihre Reise als Schuhmacher zu beginnen? Schließen Sie sich Hunderten von Schülern an und beginnen Sie, Ihre eigenen Schuhe von zu Hause aus zu kreieren!
Häufig gestellte Fragen
Wie lange dauert der Kurs?
Der Kurs ist so konzipiert, dass er in 3 Monaten abgeschlossen werden kann, Sie erhalten jedoch lebenslangen Zugriff, sodass Sie in Ihrem eigenen Tempo lernen können.
Benötige ich Erfahrung?
Überhaupt nicht! Der Kurs richtet sich an absolute Anfänger, eignet sich aber auch für fortgeschrittene Maker, die ihre Fähigkeiten verfeinern möchten.
Ist alles inklusive?
Ja! Sie erhalten ein komplettes Schuhmacher-Werkzeugset, Materialien und ein Paar professionelle Schuhleisten in Ihrer Größe – sowie alle digitalen Kursinhalte.
Kann ich eine Rückerstattung erhalten, wenn ich meine Meinung ändere?
Absolut. Wir bieten Ihnen nach dem Kauf eine 3-tägige Rückerstattungsrichtlinie , ohne dass Fragen gestellt werden.
Jetzt anmelden und mit der Erstellung beginnen
Egal, ob Sie ein aufstrebender Schuhmacher, ein kreativer Hobbyist oder ein Modeunternehmer sind – Valevro bietet Ihnen alles, was Sie brauchen, um Ihre Ideen in echte, tragbare Schuhe umzusetzen.
Beginnen Sie noch heute mit dem Erlernen des Schuhmachens.
Gestalten Sie Ihre Zukunft, Schritt für Schritt.
Weitere Produkte finden Sie auf unserer Website: https://valevro.com/collections/shoemaking-tools-and-materials
Online-Schuhmacherkurs
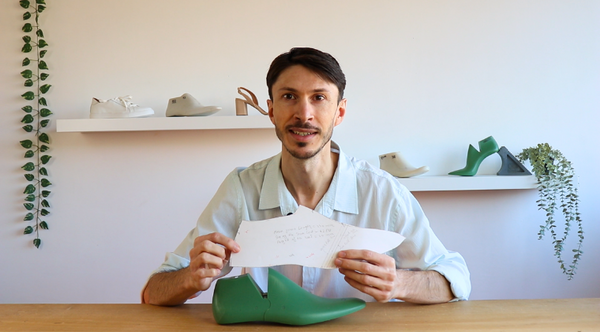
Sehen Sie sich die Kurseinführung an 👇
Entdecken Sie die Pläne
Beginnen Sie noch heute Ihre Reise als Schuhmacher!


COURSE CONTENT
See the full structure of the course with all modules and lessons.
Pattern Making Course
Shoemaking Course
Pattern Making & Shoemaking Course
Introductions
📄Thank You for Enrolling – Let’s Get Started! 👞✨
📄Your Course & Tool Kits
📄 📩 Contact me
▷ Needed tools for Pattern Making
Part 1: Pattern Making - Derby Model
Part 1: Pattern Making - Derby Model
▷ 1.1. Wrapping the shoe last
▷ 1.2. Establishing the main points and lines of the shoe last
▷ 1.3. Drawing the design lines of the model
▷ 1.4. Transferring shoe last shells in 2D
▷ 1.5. Obtaining the Mean Forme
▷ 1.6. Placing the Mean Forme in the xOy coordinate system
▷ 1.7. Transferring the design lines
▷ 1.8. Technical drawing
▷ 1.9. Extracting the patterns from technical drawing
▷ 1.10. Getting the final patterns on cardboard
Part 2: Pattern Making - Oxford Model
▷ 2.1. Efficient Use of a Pre-Existing Mean Forme
▷ 2.2. Placing the Mean Form in the xOy coordinate system
▷ 2.3. Establishing the main lines of the model
▷ 2.4. Drawing the design lines of the model
▷ 2.5. Technical drawing
▷ 2.6. Extracting the patterns from technical drawing
▷ 2.7. Getting the final patterns on cardboard
Show More
Part 3: Pattern Making - Loafer Model
▷ 3.1. Wrapping the shoe last
▷ 3.2. Establishing the main points and lines of the shoe last
▷ 3.3. Drawing the design lines of the model
▷ 3.4. Transferring shoe last shells in 2D
▷ 3.5.Technical drawing Loafer
▷ 3.6. Extracting the patterns from technical drawing
▷ 3.7. Getting the final patterns on cardboard
Part 4: Pattern Making - Ballerina Shoe Model
▷ 4.1. Wrapping the shoe last
▷ 4.2. Establish the main points and lines
▷ 4.3. Transferring shoe last shells in 2D
▷ 4.4. Technical drawing
▷ 4.5. Extracting the upper and lining patterns from technical drawing
▷ 4.6. Creating and extracting the reinforcements patterns
▷ 4.7. Getting the final patterns on cardboard
Part 5: Pattern Making - High Heels Shoes (Court Heels)
▷ 5.1. Wrapping the shoe last
▷ 5.2. Establish the main points and lines
▷ 5.3. Transferring shoe last shells in 2D
▷ 5.4. Obtaining the Mean Forme
▷ 5.5. Placing the Mean Forme in the xOy axes system
▷ 5.6. Technical drawing
▷ 5.7. Getting the upper and lining patterns from technical drawing
▷ 5.8. Creating and getting the reinforcements patterns
▷ 5.9. Creating the heel pattern
▷ 5.10. Getting the final patterns on cardboard
Part 6: Pattern Making - Sandals
▷ 6.1. wrapping shoe last
▷ 6.2. Establish the main points and lines
▷ 6.3. Drawing the design lines of the model
▷ 6.4. Transferring the pieces in 2D
▷ 6.5. Technical Drawing
▷ 6.6. Extracting the upper patterns from the technical drawing
▷ 6.7. Creating and extracting the linings
▷ 6.8. Creating and extracting the reinforcements (optional)
▷ 6.9. Creating the bottom patterns
▷ 6.10. Creating the heel pattern
▷ 6.11. Getting the final patterns on cardboard
Part 7: Pattern Making - Sneakers
▷ 7.1. Wrapping the shoe last
▷ 7.2. Establishing the main and design lines on the shoe last
▷ 7.3. Transferring shoe last shells in 2D
▷ 7.4. Obtaining the Mean Forme
▷ 7.5. Placing the Mean Form in the xOy coordinate system
▷ 7.6. Transferring the design lines
▷ 7.7. Technical drawing
▷ 7.8. Extracting the upper patterns from the technical drawing
▷ 7.9. Creating and extracting the linings
▷ 7.10. Creating and extracting the fillings and reinforcements
▷ 7.11. Getting the final patterns on cardboard
Part 8: Pattern Making - Ankle Boots
▷ 8.1. Wrapping shoe last
▷ 8.2. Establishing the main and design lines on the shoe last
▷ 8.3. Transferring shoe last shells in 2D
▷ 8.4. Obtaining the Mean Forme
▷ 8.5. Placing the Mean Form in the xOy coordinate system
▷ 8.6. Transferring the design lines
▷ 8.7. Technical drawing
▷ 8.8. Extracting the patterns from technical drawing
▷ 8.9. Getting the final patterns on cardboard
Part 9: Pattern Making - Calf High Boots
▷ 9.1. Placing the Mean Form in the xOy coordinate system
▷ 9.2. Establishing the main lines of the model
▷ 9.3. Drawing the design lines of the model
▷ 9.4. Technical drawing
▷ 9.5. Extracting the upper patterns from the technical drawing
▷ 9.6. Creating and extracting the linings
▷ 9.7. Creating and extracting the reinforcements
▷ 9.8. Getting the final patterns on cardboard
Part 10: Grading / Scaling
Download the Grading Table
▷ 10.1. Grading on the mean forme
▷ 10.2. Grading on the technical drawing
Part 11: Material Consumption
▷ 11.1. Estimating Material Consumption
Introductions
📄Thank You for Enrolling – Let’s Get Started! 👞✨
📄Your Course & Tool Kits
📄 📩 Contact me
▷ Needed tools for Pattern Making
Part 1: Material Consumption
▷ 1.1. Estimating Material Consumption
Part 2: Cutting and Skiving Leather
▷ 2.1.1. Basics of Leather Cutting
▷ 2.1.2. Basics of Lining Cutting
▷ 2.1.3. Basics of Reinforcements Cutting
▷ 2.2. Basics of Edge Skiving
Part 3: Shoe Making Process - Derby Model
▷ 3.1. Overview of the Cut Pieces
▷ 3.2. Overview of the Skived Pieces
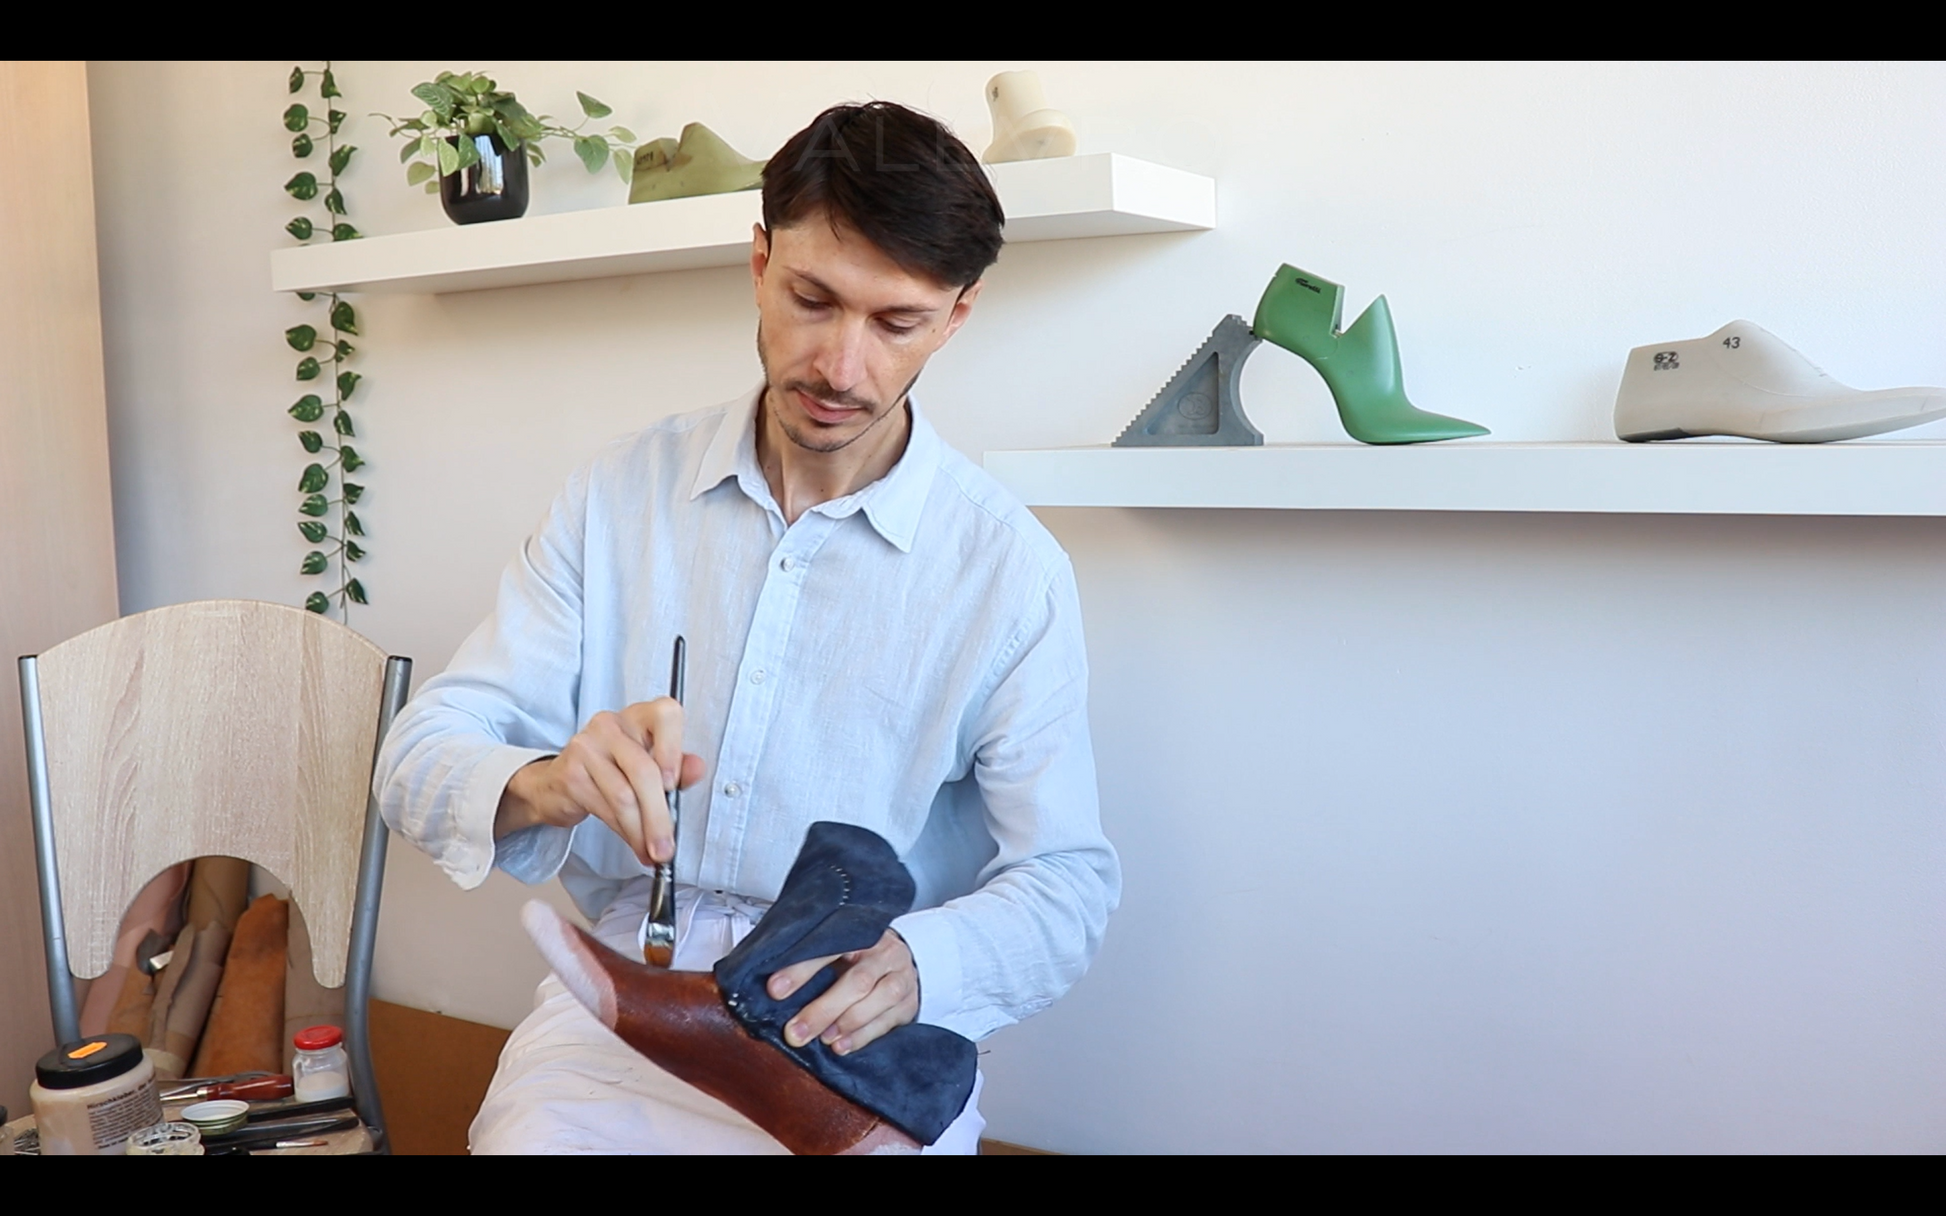
▷ 3.3. Basics of Shoemaking Stitching
▷ 3.4. Assembling and Sewing the Uppers
▷ 3.5. Lasting the Uppers
▷ 3.6. Sole construction
▷ 3.7. Heel construction
▷ 3.8. Heel and Sole Edge Finishing
▷ 3.9. Shoe Last Removal
▷ 3.10. Insole Cover Application
▷ 3.11. Finishing
Show More
Part 4: Shoe Making Process - Oxford Model
▷ 4.1. Overview of the Cut Pieces
▷ 4.2. Overview of the Skived Pieces
▷ 4.3. Assembling and Sewing the Uppers
▷ 4.4. Applying pre-made Rubber Sole
Part 5: Shoe Making Process - Loafer Model
▷ 5.1. Overview of the Cut Pieces
▷ 5.2. Overview of the Skived Pieces
▷ 5.3. Assembling and Sewing the Uppers
▷ 5.4. Creating the Insole and Sole Pattern
▷ 5.5. Lasting the Uppers
▷ 5.6. Sole construction
▷ 5.7. Attaching the Sole
▷ 5.8. Insole Cover Application
Part 6: Shoe Making Process - Ballerina Model
▷ 6.1. Overview of the Cut Pieces
▷ 6.2. Overview of the Skived Pieces
▷ 6.3. Assembling and Sewing the Uppers
▷ 6.4. Creating the insole pattern
▷ 6.5. Lasting the Uppers
▷ 6.6. Sole Application
▷ 6.7. Insole Cover Application
Part 7: Shoe Making Process - High Heels (Court)
▷ 7.1. Overview of the Cut Pieces
▷ 7.2. Overview of the Skived Pieces
▷ 7.3. Assembling and Sewing the Uppers
▷ 7.4. Heel Cover Application
▷ 7.5. Creating the Sole Pattern
▷ 7.6.1. Lasting the Uppers
▷ 7.7. Sole Making
▷ 7.8. Sole Application
▷ 7.9. Heel Application
▷ 7.10. Insole Cover Application
Part 8: Shoe Making Process - Sandals
▷ 8.1. Overview of the Cut Pieces
▷ 8.2. Assembling and Sewing the Uppers
▷ 8.3. Preparing the bottoms
▷ 8.4. Lasting the uppers
▷ 8.5. Sole Application
▷ 8.6. Heel Application
▷ 8.7. Insole Cover Application
Part 9: Shoe Making Process - Sneakers
▷ 9.1. Overview of the Cut Pieces
▷ 9.2. Overview of the Skived Pieces
▷ 9.3. Assembling and Sewing the Uppers
▷ 9.4. Creating the insole pattern
▷ 9.5. Lasting the uppers
▷ 9.6. Sole application
▷ Stitching the sole: demonstration
▷ 9.7. Insole Cover Application
Part 10: Shoe Making Process - Ankle Boots
Recommended Materials for Ankle Boot Uppers
▷ 10.1. Assembling and Sewing the Uppers
▷ 10.2. Creating the insole
▷ 10.3. Lasting the uppers
▷ 10.4. Midsole application
▷ 10.5. Midsole Hand-Stitching
▷ 10.6. Sole application and Hand-Stitching
Part 11: Shoe Making Process - Calf Boots
▷ 11.1. Overview of the Cut Pieces
▷ 11.2. Overview of the Skived Pieces
▷ 11.3. Assembling and Sewing the Uppers
▷ 11.4. Lasting the uppers
▷ 11.5. Sole application
▷ 11.6. Insole Cover Application
🎁 PDF Shop Patterns
Whole Shop Patterns
Dyed Oxford Course
Oxford Patterns
▷ 1. Main materials needed
▷ 2. Overview of the patterns
▷ 3. Overview of the Cut Pieces
▷ 4. Overview of the Skived Pieces
▷ 5. Dyeing the Pieces
▷ 6. Assembling and Sewing the Uppers
▷ 7. Lasting the Uppers
▷ 8. Adding Shading Effects
▷ 9. Sole construction
▷ 10. Heel construction
▷ 11. Edge Finishing – Smoothing Heel and Sole
▷ 12. Edge Finishing – Dyeing and Waxing Heel and Sole
▷ 13. Finishing the Bottom of the Sole
▷ 14. Finishing the Uppers
▷ 15. Shoe Last Removal
▷ 16. Insole Cover Application
High Top Sneakers
High Top Sneakers Patterns
▷ 1. Main materials needed
▷ 2. Overview of the patterns
▷ 3. Overview of the Cut Pieces
▷ 4. Overview of the Skived Pieces
▷ 5. Dyeing the Pieces
▷ 6. Assembling and Sewing the Uppers
▷ 7. Creating the insole pattern
▷ 8. Lasting the Uppers
▷ 9. Adding Shading Effects
▷ 10. Sole application
▷ 11. Sole stitching
▷ 12. Insole Cover Application
Moc Boots
Moc Boots Patterns
▷ 1. Main materials needed
▷ 2. Overview of the patterns
▷ 3. Overview of the Cut Pieces
▷ 4. Overview of the Skived Pieces
▷ 5. Assembling and Sewing the Uppers
▷ 6. Creating the insole
▷ 7. Lasting the Uppers
▷ 8. Sole construction
Introductions
📄Thank You for Enrolling – Let’s Get Started! 👞✨
📄Your Course & Tool Kits
📄 📩 Contact me
▷ Needed tools for Pattern Making
Part 1: Pattern Making - Derby Model
Part 1: Pattern Making - Derby Model
▷ 1.1. Wrapping the shoe last
▷ 1.2. Establishing the main points and lines of the shoe last
▷ 1.3. Drawing the design lines of the model
▷ 1.4. Transferring shoe last shells in 2D
▷ 1.5. Obtaining the Mean Forme
▷ 1.6. Placing the Mean Forme in the xOy coordinate system
▷ 1.7. Transferring the design lines
▷ 1.8. Technical drawing
▷ 1.9. Extracting the patterns from technical drawing
▷ 1.10. Getting the final patterns on cardboard
Part 2: Pattern Making - Oxford Model
▷ 2.1. Efficient Use of a Pre-Existing Mean Forme
▷ 2.2. Placing the Mean Form in the xOy coordinate system
▷ 2.3. Establishing the main lines of the model
▷ 2.4. Drawing the design lines of the model
▷ 2.5. Technical drawing
▷ 2.6. Extracting the patterns from technical drawing
▷ 2.7. Getting the final patterns on cardboard
Show More
Part 3: Pattern Making - Loafer Model
▷ 3.1. Wrapping the shoe last
▷ 3.2. Establishing the main points and lines of the shoe last
▷ 3.3. Drawing the design lines of the model
▷ 3.4. Transferring shoe last shells in 2D
▷ 3.5.Technical drawing Loafer
▷ 3.6. Extracting the patterns from technical drawing
▷ 3.7. Getting the final patterns on cardboard
Part 4: Pattern Making - Ballerina Shoe Model
▷ 4.1. Wrapping the shoe last
▷ 4.2. Establish the main points and lines
▷ 4.3. Transferring shoe last shells in 2D
▷ 4.4. Technical drawing
▷ 4.5. Extracting the upper and lining patterns from technical drawing
▷ 4.6. Creating and extracting the reinforcements patterns
▷ 4.7. Getting the final patterns on cardboard
Part 5: Pattern Making - High Heels Shoes (Court Heels)
▷ 5.1. Wrapping the shoe last
▷ 5.2. Establish the main points and lines
▷ 5.3. Transferring shoe last shells in 2D
▷ 5.4. Obtaining the Mean Forme
▷ 5.5. Placing the Mean Forme in the xOy axes system
▷ 5.6. Technical drawing
▷ 5.7. Getting the upper and lining patterns from technical drawing
▷ 5.8. Creating and getting the reinforcements patterns
▷ 5.9. Creating the heel pattern
▷ 5.10. Getting the final patterns on cardboard
Part 6: Pattern Making - Sandals
▷ 6.1. wrapping shoe last
▷ 6.2. Establish the main points and lines
▷ 6.3. Drawing the design lines of the model
▷ 6.4. Transferring the pieces in 2D
▷ 6.5. Technical Drawing
▷ 6.6. Extracting the upper patterns from the technical drawing
▷ 6.7. Creating and extracting the linings
▷ 6.8. Creating and extracting the reinforcements (optional)
▷ 6.9. Creating the bottom patterns
▷ 6.10. Creating the heel pattern
▷ 6.11. Getting the final patterns on cardboard
Part 7: Pattern Making - Sneakers
▷ 7.1. Wrapping the shoe last
▷ 7.2. Establishing the main and design lines on the shoe last
▷ 7.3. Transferring shoe last shells in 2D
▷ 7.4. Obtaining the Mean Forme
▷ 7.5. Placing the Mean Form in the xOy coordinate system
▷ 7.6. Transferring the design lines
▷ 7.7. Technical drawing
▷ 7.8. Extracting the upper patterns from the technical drawing
▷ 7.9. Creating and extracting the linings
▷ 7.10. Creating and extracting the fillings and reinforcements
▷ 7.11. Getting the final patterns on cardboard
Part 8: Pattern Making - Ankle Boots
▷ 8.1. Wrapping shoe last
▷ 8.2. Establishing the main and design lines on the shoe last
▷ 8.3. Transferring shoe last shells in 2D
▷ 8.4. Obtaining the Mean Forme
▷ 8.5. Placing the Mean Form in the xOy coordinate system
▷ 8.6. Transferring the design lines
▷ 8.7. Technical drawing
▷ 8.8. Extracting the patterns from technical drawing
▷ 8.9. Getting the final patterns on cardboard
Part 9: Pattern Making - Calf High Boots
▷ 9.1. Placing the Mean Form in the xOy coordinate system
▷ 9.2. Establishing the main lines of the model
▷ 9.3. Drawing the design lines of the model
▷ 9.4. Technical drawing
▷ 9.5. Extracting the upper patterns from the technical drawing
▷ 9.6. Creating and extracting the linings
▷ 9.7. Creating and extracting the reinforcements
▷ 9.8. Getting the final patterns on cardboard
Part 10: Grading / Scaling
Download the Grading Table
▷ 10.1. Grading on the mean forme
▷ 10.2. Grading on the technical drawing
Part 11: Material Consumption
▷ 11.1. Estimating Material Consumption
Shoemaking Equipment and Tools You Will Need
📄 1 - Main Tools Commonly Used in Shoemaking
📄 2 - Main Materials Commonly Used in Shoemaking
📄 3 - Main Shoemaking Adhesives-Glues
▷ 4 - Basics of Shoemaking Stitching
📄 ❓Where to Find Shoemaking Supplies
Part 12: Cutting and Skiving Leather
▷ 12.1.1. Basics of Leather Cutting
▷ 12.1.2. Basics of Lining Cutting
▷ 12.1.3. Basics of Reinforcements Cutting
▷ 12.2. Basics of Edge Skiving
Part 13: Shoe Making Process - Derby Model
▷ 13.1. Overview of the Cut Pieces
▷ 13.2. Overview of the Skived Pieces
▷ 13.3. Basics of Shoemaking Stitching
▷ 13.4. Assembling and Sewing the Uppers
▷ 13.5. Lasting the Uppers
▷ 13.6. Sole construction
▷ 13.7. Heel construction
▷ 13.8. Heel and Sole Edge Finishing
▷ 13.9. Shoe Last Removal
▷ 13.10. Insole Cover Application
▷ 13.11. Finishing
Part 14: Shoe Making Process - Oxford Model
▷ 14.1. Overview of the Cut Pieces
▷ 14.2. Overview of the Skived Pieces
▷ 14.3. Assembling and Sewing the Uppers
▷ 14.4. Applying pre-made Rubber Sole
Part 15: Shoe Making Process - Loafer Model
▷ 15.1. Overview of the Cut Pieces
▷ 15.2. Overview of the Skived Pieces
▷ 15.3. Assembling and Sewing the Uppers
▷ 15.4. Creating the Insole and Sole Pattern
▷ 15.5. Lasting the Uppers
▷ 15.6. Sole construction
▷ 15.7. Attaching the Sole
▷ 15.8. Insole Cover Application
Part 16: Shoe Making Process - Ballerina Model
▷ 16.1. Overview of the Cut Pieces
▷ 16.2. Overview of the Skived Pieces
▷ 16.3. Assembling and Sewing the Uppers
▷ 16.4. Creating the insole pattern
▷ 16.5. Lasting the Uppers
▷ 16.6. Sole Application
▷ 16.7. Insole Cover Application
Part 17: Shoe Making Process - High Heels (Court)
▷ 17.1. Overview of the Cut Pieces
▷ 17.2. Overview of the Skived Pieces
▷ 17.3. Assembling and Sewing the Uppers
▷ 17.4. Heel Cover Application
▷ 17.5. Creating the Sole Pattern
▷ 17.6. Lasting the Uppers
▷ 17.7. Sole Making
▷ 17.8. Sole Application
▷ 17.9. Heel Application
▷ 17.10. Insole Cover Application
Part 18: Shoe Making Process - Sandals
▷ 18.1. Overview of the Cut Pieces
▷ 18.2. Assembling and Sewing the Uppers
▷ 18.3. Preparing the bottoms
▷ 18.4. Lasting the uppers
▷ 18.5. Sole Application
▷ 18.6. Heel Application
▷ 18.7. Insole Cover Application
Part 19: Shoe Making Process - Sneakers
▷ 19.1. Overview of the Cut Pieces
▷ 19.2. Overview of the Skived Pieces
▷ 19.3. Assembling and Sewing the Uppers
▷ 19.4. Creating the insole pattern
▷ 19.5. Lasting the uppers
▷ 19.6. Sole application
▷ Stitching the sole: demonstration
▷ 19.7. Insole Cover Application
Part 20: Shoe Making Process - Ankle Boots
Recommended Materials for Ankle Boot Uppers
▷ 20.1. Assembling and Sewing the Uppers
▷ 20.2. Creating the insole
▷ 20.3. Lasting the uppers
▷ 20.4. Midsole application
▷ 20.5. Midsole Hand-Stitching
▷ 20.6. Sole application and Hand-Stitching
Part 21: Shoe Making Process - Calf Boots
▷ 21.1. Overview of the Cut Pieces
▷ 21.2. Overview of the Skived Pieces
▷ 21.3. Assembling and Sewing the Uppers
▷ 21.4. Lasting the uppers
▷ 21.5. Sole application
▷ 21.6. Insole Cover Application
🎁 PDF Shop Patterns
Whole Shop Patterns
Dyed Oxford Course
Oxford Patterns
▷ 1. Main materials needed
▷ 2. Overview of the patterns
▷ 3. Overview of the Cut Pieces
▷ 4. Overview of the Skived Pieces
▷ 5. Dyeing the Pieces
▷ 6. Assembling and Sewing the Uppers
▷ 7. Lasting the Uppers
▷ 8. Adding Shading Effects
▷ 9. Sole construction
▷ 10. Heel construction
▷ 11. Edge Finishing – Smoothing Heel and Sole
▷ 12. Edge Finishing – Dyeing and Waxing Heel and Sole
▷ 13. Finishing the Bottom of the Sole
▷ 14. Finishing the Uppers
▷ 15. Shoe Last Removal
▷ 16. Insole Cover Application
High Top Sneakers
High Top Sneakers Patterns
▷ 1. Main materials needed
▷ 2. Overview of the patterns
▷ 3. Overview of the Cut Pieces
▷ 4. Overview of the Skived Pieces
▷ 5. Dyeing the Pieces
▷ 6. Assembling and Sewing the Uppers
▷ 7. Creating the insole pattern
▷ 8. Lasting the Uppers
▷ 9. Adding Shading Effects
▷ 10. Sole application
▷ 11. Sole stitching
▷ 12. Insole Cover Application
Moc Boots
Moc Boots Patterns
▷ 1. Main materials needed
▷ 2. Overview of the patterns
▷ 3. Overview of the Cut Pieces
▷ 4. Overview of the Skived Pieces
▷ 5. Assembling and Sewing the Uppers
▷ 6. Creating the insole
▷ 7. Lasting the Uppers
▷ 8. Sole construction
Warum VALEVRO wählen?
Sie erfahren nicht nur, wie man Schuhe herstellt, sondern auch, warum jeder Schritt wichtig ist!
Bei Valevro geht es nicht nur um die Herstellung von Schnittmustern oder Schuhen – es geht darum, die Schuhherstellung von Grund auf zu verstehen. Sie erfahren, wie Schnittmuster mit der Konstruktion zusammenhängen, wie Materialien das Ergebnis beeinflussen und wie Sie Ihre eigenen Designs zum Leben erwecken.
Unsere Studenten sagen es besser!
Über 300 zufriedene Studenten weltweit
Ausgezeichnet 4,9/5


Customer Creations
Real results from customers who followed the course.


James Tom
Highly recommend this sellers shoe making


Andrea P.
Very practical and well explained. I enjoyed every step.


Alicia
Boots I made from your course. I love them and they are super comfy.


Dan Mallais
You’re the GOAT!


Krystal C.
I recently finished my very first pair of shoes and I am quite happy with them.
James Tom
Highly recommend this sellers shoe making
Andrea P.
Very practical and well explained. I enjoyed every step.
Alicia
Boots I made from your course. I love them and they are super comfy.
Dan Mallais
You’re the GOAT!
Krystal C.
I recently finished my very first pair of shoes and I am quite happy with them.

Lernen Sie Ihren Lehrer kennen
Hallo! Ich bin Justin! Ich bin der Gründer von VALEVRO und ein passionierter Schuhmacher. Seit über 10 Jahren bin ich professioneller Schuhmacher und Modellbauer. In dieser Zeit habe ich ein tiefes Verständnis für das Handwerk entwickelt – das Entwerfen, Modellieren und Konstruieren von Schuhen, die nicht nur schön aussehen, sondern auch perfekt passen.
Meine Mission ist es nun, andere zu ermutigen und zu inspirieren, ihren kreativen Träumen zu folgen – genau wie ich es tat, als ich die Kunst des Schuhmachens entdeckte. Ich teile gerne die Fähigkeiten und Techniken, die ich entwickelt habe, damit auch Sie Ihre Ideen verwirklichen und der Schuhmacher werden können, der Sie sein möchten.
Häufig gestellte Fragen
Unten finden Sie Antworten! Bei weiteren Fragen wenden Sie sich bitte an office@valevro.com😊
Handelt es sich dabei um Online-Kurse oder nur um Lehrvideos?
Es handelt sich um umfassende Online-Kurse mit detaillierten, schrittweisen Videolektionen. Jeder Kurs bietet ein strukturiertes Lernerlebnis, und alle Lektionen sind vorab aufgezeichnet. So können Sie in Ihrem eigenen Tempo lernen und jederzeit online auf das Material zugreifen.
Benötige ich Vorkenntnisse, um am Kurs teilzunehmen?
Nein! Jeder Kurs ist sowohl für Anfänger als auch für erfahrene Maker konzipiert. Du lernst alles Schritt für Schritt – von Grund auf.
Was lerne ich im Schnittmustererstellungskurs?
Sie lernen, Schnittmuster für neun grundlegende Schuhmodelle zu erstellen. Die Beherrschung dieser neun Modelle vermittelt Ihnen das nötige Grundwissen, um Schnittmuster für jeden Schuhstil zu erstellen und Ihre Fähigkeiten auf unzählige Designmöglichkeiten anzuwenden.
Was lerne ich im Schuhmacherkurs?
Lernen Sie, wie man Schuhe von Anfang bis Ende herstellt. Am Ende verfügen Sie über das Wissen und die Fähigkeiten, jedes Schuhmodell zum Leben zu erwecken.
Was lerne ich im Kurs „Schnittmustererstellung und Schuhherstellung“?
Im Kurs „Schnittmustererstellung und Schuhherstellung“ erwerben Sie umfassende Kenntnisse in der Schnittmustererstellung und Schuhherstellung. Sie lernen, wie Sie Schnittmuster für beliebige Schuhe entwerfen und mit Ihren eigenen Händen zum Leben erwecken.
Benötige ich spezielle Software zum Erstellen von Schuhmustern?
Nein, Sie benötigen keine Software! Der Kurs vermittelt Techniken zur manuellen Schnittmustererstellung, sodass Sie mit einfachen Werkzeugen wie Lineal, Bleistift, Bastelmesser und anderen Werkzeugen ganz einfach Schnittmuster erstellen können.
Wie lange dauert der Kurs?
Der komplette Kurs – Schnittmuster- und Schuhmacherkurs – dauert voraussichtlich etwa drei Monate und umfasst täglich 1 Stunde und 30 Minuten Lernzeit. Sie können jedoch Ihr eigenes Tempo bestimmen und sich je nach Zeitplan und Lernpräferenzen mehr oder weniger Zeit nehmen.
Bekomme ich lebenslangen Zugriff auf den Kurs?
Ja! Sobald Sie sich angemeldet haben, haben Sie lebenslangen Zugriff auf alle Lektionen, einschließlich zukünftiger Updates.
Bekomme ich Unterstützung, wenn ich während des Kurses Fragen habe?
Ja! Sie sind jederzeit herzlich willkommen. Bei Fragen steht Ihnen unser Support per E-Mail zur Verfügung. Ich begleite Sie Schritt für Schritt, bis Sie alles vollständig verstanden haben.