Curso completo de zapatería online
Pasa de principiante a zapatero con lecciones paso a paso que te guiarán en todo el proceso: desde el diseño hasta un par terminado.
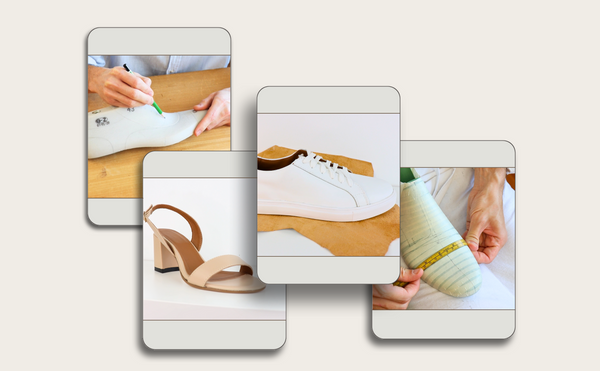
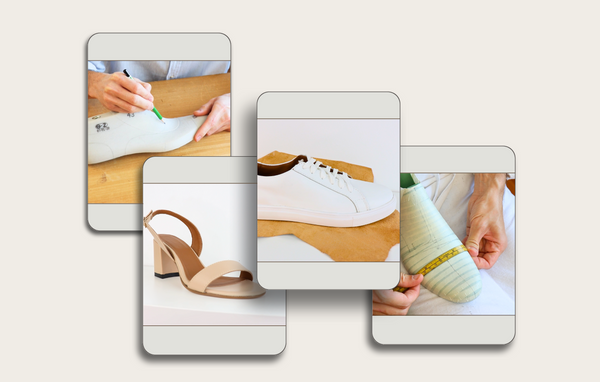
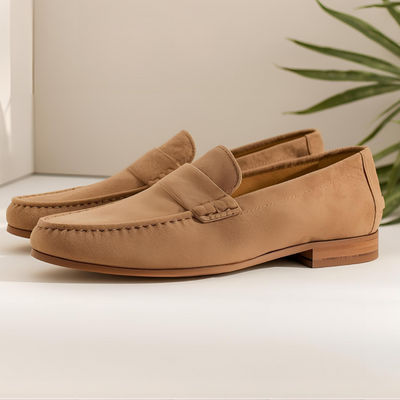
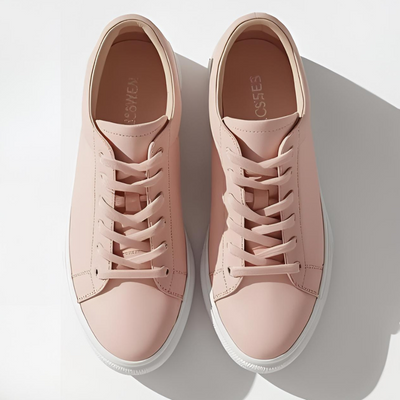
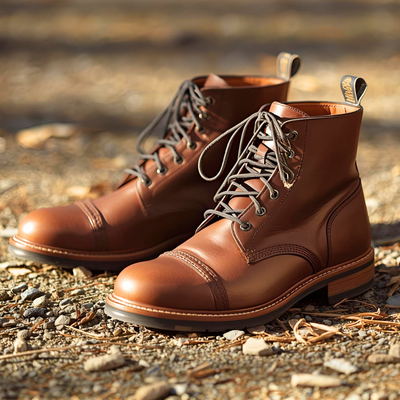
- Aprende a crear patrones para todos los estilos icónicos de calzado: Oxford, Derby, Mocasines (Loafers), Tacones Altos, Zapatillas (Sneakers), Sandalias, Bailarinas, Botines y Botas de media caña.
- Aprende a fabricar cada estilo de zapato utilizando varios métodos — desde la construcción cementada hasta la técnica Stitchdown.
- Aprende a aplicar técnicas de acabado en la fabricación de calzado.
Aprende zapatería paso a paso desde cero con el curso completo online de VALEVRO. Incluye herramientas y hormas. ¡Únete ya!
Lo que aprenderás
En este curso, explorarás el proceso paso a paso de fabricación de zapatos de principio a fin.
Aprenderás a:
-
Crea patrones para zapatos Oxford, Derby, mocasines, tacones altos, zapatillas deportivas, sandalias, bailarinas, botines y botas de pantorrilla.
-
Comprender la anatomía del calzado y la preparación de la horma.
-
Cortar, ensamblar y construir cada zapato a mano.
-
Aplicar técnicas de acabado utilizadas por zapateros profesionales.
Al finalizar el curso, podrás diseñar, patronar y fabricar a mano cualquier modelo de calzado con confianza.
Qué está incluido
Al inscribirte, no solo obtendrás acceso a instrucción experta, sino que también recibirás un kit de herramientas completo para fabricar calzado enviado a tu puerta.
Incluido con su inscripción al curso:
✅ Un par de hormas profesionales para zapatos (en la talla seleccionada)
✅ Herramientas para zapatería de alta calidad
✅ Materiales esenciales para la fabricación de calzado
✅ Acceso de por vida a todas las lecciones y futuras actualizaciones del curso.
✅ Acceso a 9 proyectos completos de patronaje y zapatería
✅ Soporte a través de nuestra comunidad estudiantil y correo electrónico
Entregamos tus herramientas y hormas directamente a tu puerta, para que puedas comenzar a crear sin demora.
¿Por qué elegir Valevro?
En Valevro, hacemos más que solo enseñar: tú creas. Nuestro curso fue diseñado pensando en aspirantes a artesanos y futuros diseñadores de calzado.
Esta es la razón por la que estudiantes de todo el mundo confían en Valevro:
-
🧠 Todos los niveles de habilidad son bienvenidos , no se necesita experiencia
-
🧰 Aprende haciendo : construye zapatos reales de principio a fin
-
🎓 Asesoramiento experto , basado en años de experiencia profesional en la fabricación de calzado.
-
🌍 Acceso global : toma el curso desde cualquier lugar, según tu horario
-
🎁 Herramientas y hormas gratuitas : todo lo que necesitas para comenzar tu viaje
A diferencia de otros cursos, el nuestro se centra en capacitarte con técnicas repetibles y de nivel profesional que durarán toda la vida.
Ya sea que sueñes con lanzar tu propia línea o simplemente fabricar zapatos para ti mismo, este es tu comienzo.
Testimonios
Nuestros estudiantes están convirtiendo su pasión en habilidad, un par de zapatos a la vez. Esto es lo que dicen:
No tenía ninguna experiencia, pero hice mi primer par de mocasines en pocas semanas. Las instrucciones son súper claras y los patrones son preciosos.
— Anna T., Estados Unidos
¡Me encantó recibir mi kit de herramientas por correo! Todo está muy bien explicado y ahora me siento segura para diseñar y crear mis propios estilos.
— Jake M., Reino Unido
Es el curso de zapatería más completo que he encontrado. Realmente te lleva de la A a la Z.
— Louise R., Francia
¿Listo para empezar tu aventura zapatera? ¡Únete a cientos de estudiantes y crea tus propios zapatos desde casa!
Preguntas frecuentes
¿Cuánto dura el curso?
El curso está diseñado para completarse en 3 meses, pero tendrás acceso de por vida para que puedas aprender a tu propio ritmo.
¿Necesito alguna experiencia?
¡Para nada! El curso está diseñado para principiantes absolutos, pero también es ideal para creadores de nivel intermedio que quieran perfeccionar sus habilidades.
¿Está todo incluido?
¡Sí! Recibirás un kit completo de herramientas para zapatero, materiales y un par de hormas profesionales de tu talla, además de todo el contenido digital del curso.
¿Puedo obtener un reembolso si cambio de opinión?
Por supuesto. Ofrecemos un reembolso completo en 3 días después de la compra, sin preguntas.
Inscríbete ahora y empieza a crear
Ya sea que usted sea un aspirante a zapatero, un aficionado creativo o un empresario de la moda, Valevro le brinda todo lo que necesita para convertir sus ideas en zapatos reales y usables.
Empiece a aprender a fabricar zapatos hoy mismo.
Construye tu futuro, paso a paso.
Vea más productos en nuestra web: https://valevro.com/collections/shoemaking-tools-and-materials
Curso de zapatería online
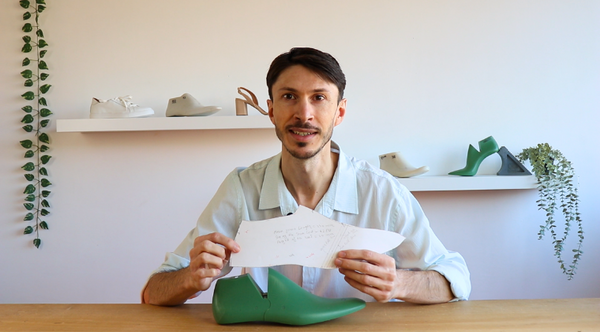
Mira la introducción del curso 👇
Explora los planes
¡Comienza tu viaje en la fabricación de calzado hoy mismo!


COURSE CONTENT
See the full structure of the course with all modules and lessons.
Pattern Making Course
Shoemaking Course
Pattern Making & Shoemaking Course
Introductions
📄Thank You for Enrolling – Let’s Get Started! 👞✨
📄Your Course & Tool Kits
📄 📩 Contact me
▷ Needed tools for Pattern Making
Part 1: Pattern Making - Derby Model
Part 1: Pattern Making - Derby Model
▷ 1.1. Wrapping the shoe last
▷ 1.2. Establishing the main points and lines of the shoe last
▷ 1.3. Drawing the design lines of the model
▷ 1.4. Transferring shoe last shells in 2D
▷ 1.5. Obtaining the Mean Forme
▷ 1.6. Placing the Mean Forme in the xOy coordinate system
▷ 1.7. Transferring the design lines
▷ 1.8. Technical drawing
▷ 1.9. Extracting the patterns from technical drawing
▷ 1.10. Getting the final patterns on cardboard
Part 2: Pattern Making - Oxford Model
▷ 2.1. Efficient Use of a Pre-Existing Mean Forme
▷ 2.2. Placing the Mean Form in the xOy coordinate system
▷ 2.3. Establishing the main lines of the model
▷ 2.4. Drawing the design lines of the model
▷ 2.5. Technical drawing
▷ 2.6. Extracting the patterns from technical drawing
▷ 2.7. Getting the final patterns on cardboard
Show More
Part 3: Pattern Making - Loafer Model
▷ 3.1. Wrapping the shoe last
▷ 3.2. Establishing the main points and lines of the shoe last
▷ 3.3. Drawing the design lines of the model
▷ 3.4. Transferring shoe last shells in 2D
▷ 3.5.Technical drawing Loafer
▷ 3.6. Extracting the patterns from technical drawing
▷ 3.7. Getting the final patterns on cardboard
Part 4: Pattern Making - Ballerina Shoe Model
▷ 4.1. Wrapping the shoe last
▷ 4.2. Establish the main points and lines
▷ 4.3. Transferring shoe last shells in 2D
▷ 4.4. Technical drawing
▷ 4.5. Extracting the upper and lining patterns from technical drawing
▷ 4.6. Creating and extracting the reinforcements patterns
▷ 4.7. Getting the final patterns on cardboard
Part 5: Pattern Making - High Heels Shoes (Court Heels)
▷ 5.1. Wrapping the shoe last
▷ 5.2. Establish the main points and lines
▷ 5.3. Transferring shoe last shells in 2D
▷ 5.4. Obtaining the Mean Forme
▷ 5.5. Placing the Mean Forme in the xOy axes system
▷ 5.6. Technical drawing
▷ 5.7. Getting the upper and lining patterns from technical drawing
▷ 5.8. Creating and getting the reinforcements patterns
▷ 5.9. Creating the heel pattern
▷ 5.10. Getting the final patterns on cardboard
Part 6: Pattern Making - Sandals
▷ 6.1. wrapping shoe last
▷ 6.2. Establish the main points and lines
▷ 6.3. Drawing the design lines of the model
▷ 6.4. Transferring the pieces in 2D
▷ 6.5. Technical Drawing
▷ 6.6. Extracting the upper patterns from the technical drawing
▷ 6.7. Creating and extracting the linings
▷ 6.8. Creating and extracting the reinforcements (optional)
▷ 6.9. Creating the bottom patterns
▷ 6.10. Creating the heel pattern
▷ 6.11. Getting the final patterns on cardboard
Part 7: Pattern Making - Sneakers
▷ 7.1. Wrapping the shoe last
▷ 7.2. Establishing the main and design lines on the shoe last
▷ 7.3. Transferring shoe last shells in 2D
▷ 7.4. Obtaining the Mean Forme
▷ 7.5. Placing the Mean Form in the xOy coordinate system
▷ 7.6. Transferring the design lines
▷ 7.7. Technical drawing
▷ 7.8. Extracting the upper patterns from the technical drawing
▷ 7.9. Creating and extracting the linings
▷ 7.10. Creating and extracting the fillings and reinforcements
▷ 7.11. Getting the final patterns on cardboard
Part 8: Pattern Making - Ankle Boots
▷ 8.1. Wrapping shoe last
▷ 8.2. Establishing the main and design lines on the shoe last
▷ 8.3. Transferring shoe last shells in 2D
▷ 8.4. Obtaining the Mean Forme
▷ 8.5. Placing the Mean Form in the xOy coordinate system
▷ 8.6. Transferring the design lines
▷ 8.7. Technical drawing
▷ 8.8. Extracting the patterns from technical drawing
▷ 8.9. Getting the final patterns on cardboard
Part 9: Pattern Making - Calf High Boots
▷ 9.1. Placing the Mean Form in the xOy coordinate system
▷ 9.2. Establishing the main lines of the model
▷ 9.3. Drawing the design lines of the model
▷ 9.4. Technical drawing
▷ 9.5. Extracting the upper patterns from the technical drawing
▷ 9.6. Creating and extracting the linings
▷ 9.7. Creating and extracting the reinforcements
▷ 9.8. Getting the final patterns on cardboard
Part 10: Grading / Scaling
Download the Grading Table
▷ 10.1. Grading on the mean forme
▷ 10.2. Grading on the technical drawing
Part 11: Material Consumption
▷ 11.1. Estimating Material Consumption
Introductions
📄Thank You for Enrolling – Let’s Get Started! 👞✨
📄Your Course & Tool Kits
📄 📩 Contact me
▷ Needed tools for Pattern Making
Part 1: Material Consumption
▷ 1.1. Estimating Material Consumption
Part 2: Cutting and Skiving Leather
▷ 2.1.1. Basics of Leather Cutting
▷ 2.1.2. Basics of Lining Cutting
▷ 2.1.3. Basics of Reinforcements Cutting
▷ 2.2. Basics of Edge Skiving
Part 3: Shoe Making Process - Derby Model
▷ 3.1. Overview of the Cut Pieces
▷ 3.2. Overview of the Skived Pieces
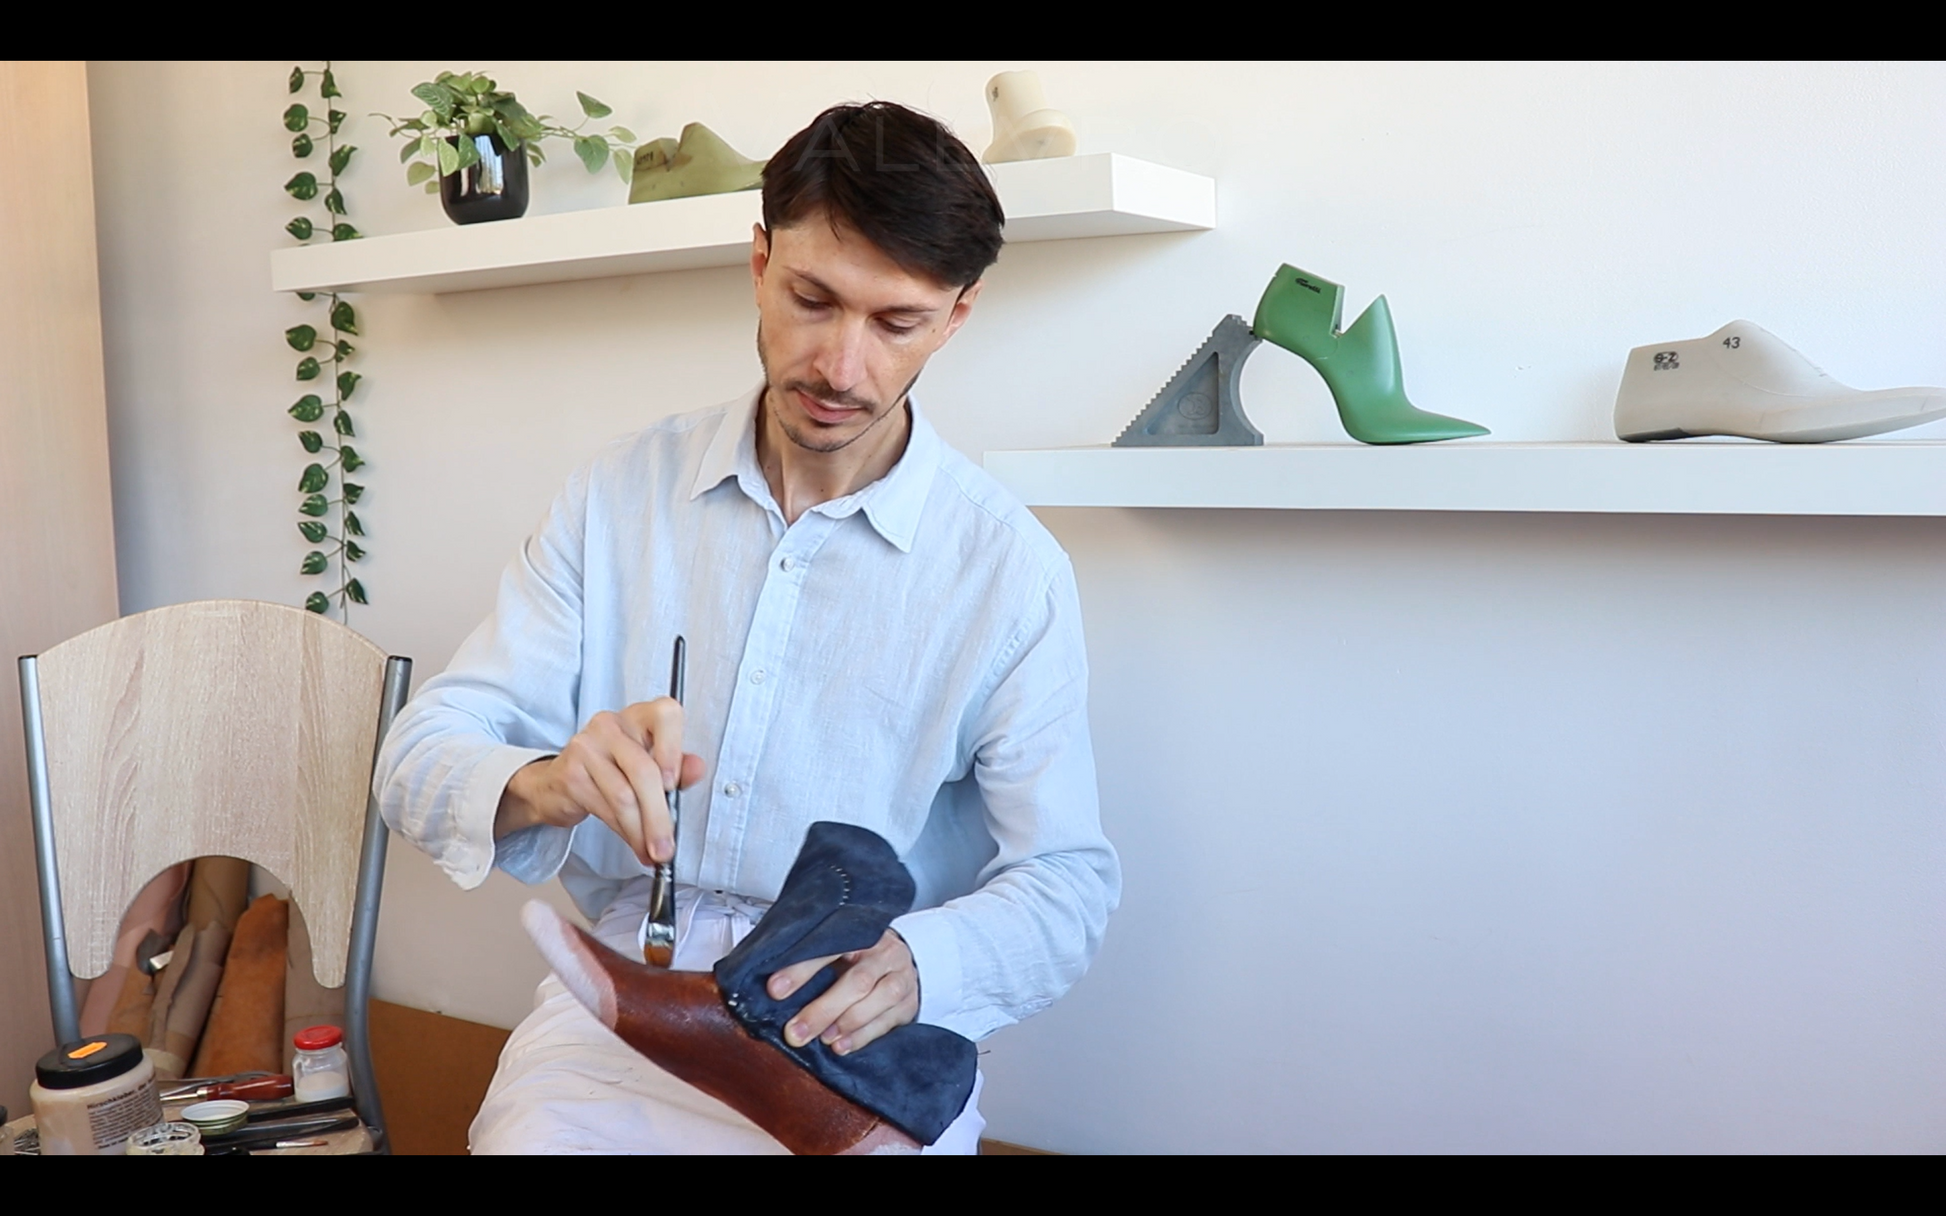
▷ 3.3. Basics of Shoemaking Stitching
▷ 3.4. Assembling and Sewing the Uppers
▷ 3.5. Lasting the Uppers
▷ 3.6. Sole construction
▷ 3.7. Heel construction
▷ 3.8. Heel and Sole Edge Finishing
▷ 3.9. Shoe Last Removal
▷ 3.10. Insole Cover Application
▷ 3.11. Finishing
Show More
Part 4: Shoe Making Process - Oxford Model
▷ 4.1. Overview of the Cut Pieces
▷ 4.2. Overview of the Skived Pieces
▷ 4.3. Assembling and Sewing the Uppers
▷ 4.4. Applying pre-made Rubber Sole
Part 5: Shoe Making Process - Loafer Model
▷ 5.1. Overview of the Cut Pieces
▷ 5.2. Overview of the Skived Pieces
▷ 5.3. Assembling and Sewing the Uppers
▷ 5.4. Creating the Insole and Sole Pattern
▷ 5.5. Lasting the Uppers
▷ 5.6. Sole construction
▷ 5.7. Attaching the Sole
▷ 5.8. Insole Cover Application
Part 6: Shoe Making Process - Ballerina Model
▷ 6.1. Overview of the Cut Pieces
▷ 6.2. Overview of the Skived Pieces
▷ 6.3. Assembling and Sewing the Uppers
▷ 6.4. Creating the insole pattern
▷ 6.5. Lasting the Uppers
▷ 6.6. Sole Application
▷ 6.7. Insole Cover Application
Part 7: Shoe Making Process - High Heels (Court)
▷ 7.1. Overview of the Cut Pieces
▷ 7.2. Overview of the Skived Pieces
▷ 7.3. Assembling and Sewing the Uppers
▷ 7.4. Heel Cover Application
▷ 7.5. Creating the Sole Pattern
▷ 7.6.1. Lasting the Uppers
▷ 7.7. Sole Making
▷ 7.8. Sole Application
▷ 7.9. Heel Application
▷ 7.10. Insole Cover Application
Part 8: Shoe Making Process - Sandals
▷ 8.1. Overview of the Cut Pieces
▷ 8.2. Assembling and Sewing the Uppers
▷ 8.3. Preparing the bottoms
▷ 8.4. Lasting the uppers
▷ 8.5. Sole Application
▷ 8.6. Heel Application
▷ 8.7. Insole Cover Application
Part 9: Shoe Making Process - Sneakers
▷ 9.1. Overview of the Cut Pieces
▷ 9.2. Overview of the Skived Pieces
▷ 9.3. Assembling and Sewing the Uppers
▷ 9.4. Creating the insole pattern
▷ 9.5. Lasting the uppers
▷ 9.6. Sole application
▷ Stitching the sole: demonstration
▷ 9.7. Insole Cover Application
Part 10: Shoe Making Process - Ankle Boots
Recommended Materials for Ankle Boot Uppers
▷ 10.1. Assembling and Sewing the Uppers
▷ 10.2. Creating the insole
▷ 10.3. Lasting the uppers
▷ 10.4. Midsole application
▷ 10.5. Midsole Hand-Stitching
▷ 10.6. Sole application and Hand-Stitching
Part 11: Shoe Making Process - Calf Boots
▷ 11.1. Overview of the Cut Pieces
▷ 11.2. Overview of the Skived Pieces
▷ 11.3. Assembling and Sewing the Uppers
▷ 11.4. Lasting the uppers
▷ 11.5. Sole application
▷ 11.6. Insole Cover Application
🎁 PDF Shop Patterns
Whole Shop Patterns
Dyed Oxford Course
Oxford Patterns
▷ 1. Main materials needed
▷ 2. Overview of the patterns
▷ 3. Overview of the Cut Pieces
▷ 4. Overview of the Skived Pieces
▷ 5. Dyeing the Pieces
▷ 6. Assembling and Sewing the Uppers
▷ 7. Lasting the Uppers
▷ 8. Adding Shading Effects
▷ 9. Sole construction
▷ 10. Heel construction
▷ 11. Edge Finishing – Smoothing Heel and Sole
▷ 12. Edge Finishing – Dyeing and Waxing Heel and Sole
▷ 13. Finishing the Bottom of the Sole
▷ 14. Finishing the Uppers
▷ 15. Shoe Last Removal
▷ 16. Insole Cover Application
High Top Sneakers
High Top Sneakers Patterns
▷ 1. Main materials needed
▷ 2. Overview of the patterns
▷ 3. Overview of the Cut Pieces
▷ 4. Overview of the Skived Pieces
▷ 5. Dyeing the Pieces
▷ 6. Assembling and Sewing the Uppers
▷ 7. Creating the insole pattern
▷ 8. Lasting the Uppers
▷ 9. Adding Shading Effects
▷ 10. Sole application
▷ 11. Sole stitching
▷ 12. Insole Cover Application
Moc Boots
Moc Boots Patterns
▷ 1. Main materials needed
▷ 2. Overview of the patterns
▷ 3. Overview of the Cut Pieces
▷ 4. Overview of the Skived Pieces
▷ 5. Assembling and Sewing the Uppers
▷ 6. Creating the insole
▷ 7. Lasting the Uppers
▷ 8. Sole construction
Introductions
📄Thank You for Enrolling – Let’s Get Started! 👞✨
📄Your Course & Tool Kits
📄 📩 Contact me
▷ Needed tools for Pattern Making
Part 1: Pattern Making - Derby Model
Part 1: Pattern Making - Derby Model
▷ 1.1. Wrapping the shoe last
▷ 1.2. Establishing the main points and lines of the shoe last
▷ 1.3. Drawing the design lines of the model
▷ 1.4. Transferring shoe last shells in 2D
▷ 1.5. Obtaining the Mean Forme
▷ 1.6. Placing the Mean Forme in the xOy coordinate system
▷ 1.7. Transferring the design lines
▷ 1.8. Technical drawing
▷ 1.9. Extracting the patterns from technical drawing
▷ 1.10. Getting the final patterns on cardboard
Part 2: Pattern Making - Oxford Model
▷ 2.1. Efficient Use of a Pre-Existing Mean Forme
▷ 2.2. Placing the Mean Form in the xOy coordinate system
▷ 2.3. Establishing the main lines of the model
▷ 2.4. Drawing the design lines of the model
▷ 2.5. Technical drawing
▷ 2.6. Extracting the patterns from technical drawing
▷ 2.7. Getting the final patterns on cardboard
Show More
Part 3: Pattern Making - Loafer Model
▷ 3.1. Wrapping the shoe last
▷ 3.2. Establishing the main points and lines of the shoe last
▷ 3.3. Drawing the design lines of the model
▷ 3.4. Transferring shoe last shells in 2D
▷ 3.5.Technical drawing Loafer
▷ 3.6. Extracting the patterns from technical drawing
▷ 3.7. Getting the final patterns on cardboard
Part 4: Pattern Making - Ballerina Shoe Model
▷ 4.1. Wrapping the shoe last
▷ 4.2. Establish the main points and lines
▷ 4.3. Transferring shoe last shells in 2D
▷ 4.4. Technical drawing
▷ 4.5. Extracting the upper and lining patterns from technical drawing
▷ 4.6. Creating and extracting the reinforcements patterns
▷ 4.7. Getting the final patterns on cardboard
Part 5: Pattern Making - High Heels Shoes (Court Heels)
▷ 5.1. Wrapping the shoe last
▷ 5.2. Establish the main points and lines
▷ 5.3. Transferring shoe last shells in 2D
▷ 5.4. Obtaining the Mean Forme
▷ 5.5. Placing the Mean Forme in the xOy axes system
▷ 5.6. Technical drawing
▷ 5.7. Getting the upper and lining patterns from technical drawing
▷ 5.8. Creating and getting the reinforcements patterns
▷ 5.9. Creating the heel pattern
▷ 5.10. Getting the final patterns on cardboard
Part 6: Pattern Making - Sandals
▷ 6.1. wrapping shoe last
▷ 6.2. Establish the main points and lines
▷ 6.3. Drawing the design lines of the model
▷ 6.4. Transferring the pieces in 2D
▷ 6.5. Technical Drawing
▷ 6.6. Extracting the upper patterns from the technical drawing
▷ 6.7. Creating and extracting the linings
▷ 6.8. Creating and extracting the reinforcements (optional)
▷ 6.9. Creating the bottom patterns
▷ 6.10. Creating the heel pattern
▷ 6.11. Getting the final patterns on cardboard
Part 7: Pattern Making - Sneakers
▷ 7.1. Wrapping the shoe last
▷ 7.2. Establishing the main and design lines on the shoe last
▷ 7.3. Transferring shoe last shells in 2D
▷ 7.4. Obtaining the Mean Forme
▷ 7.5. Placing the Mean Form in the xOy coordinate system
▷ 7.6. Transferring the design lines
▷ 7.7. Technical drawing
▷ 7.8. Extracting the upper patterns from the technical drawing
▷ 7.9. Creating and extracting the linings
▷ 7.10. Creating and extracting the fillings and reinforcements
▷ 7.11. Getting the final patterns on cardboard
Part 8: Pattern Making - Ankle Boots
▷ 8.1. Wrapping shoe last
▷ 8.2. Establishing the main and design lines on the shoe last
▷ 8.3. Transferring shoe last shells in 2D
▷ 8.4. Obtaining the Mean Forme
▷ 8.5. Placing the Mean Form in the xOy coordinate system
▷ 8.6. Transferring the design lines
▷ 8.7. Technical drawing
▷ 8.8. Extracting the patterns from technical drawing
▷ 8.9. Getting the final patterns on cardboard
Part 9: Pattern Making - Calf High Boots
▷ 9.1. Placing the Mean Form in the xOy coordinate system
▷ 9.2. Establishing the main lines of the model
▷ 9.3. Drawing the design lines of the model
▷ 9.4. Technical drawing
▷ 9.5. Extracting the upper patterns from the technical drawing
▷ 9.6. Creating and extracting the linings
▷ 9.7. Creating and extracting the reinforcements
▷ 9.8. Getting the final patterns on cardboard
Part 10: Grading / Scaling
Download the Grading Table
▷ 10.1. Grading on the mean forme
▷ 10.2. Grading on the technical drawing
Part 11: Material Consumption
▷ 11.1. Estimating Material Consumption
Shoemaking Equipment and Tools You Will Need
📄 1 - Main Tools Commonly Used in Shoemaking
📄 2 - Main Materials Commonly Used in Shoemaking
📄 3 - Main Shoemaking Adhesives-Glues
▷ 4 - Basics of Shoemaking Stitching
📄 ❓Where to Find Shoemaking Supplies
Part 12: Cutting and Skiving Leather
▷ 12.1.1. Basics of Leather Cutting
▷ 12.1.2. Basics of Lining Cutting
▷ 12.1.3. Basics of Reinforcements Cutting
▷ 12.2. Basics of Edge Skiving
Part 13: Shoe Making Process - Derby Model
▷ 13.1. Overview of the Cut Pieces
▷ 13.2. Overview of the Skived Pieces
▷ 13.3. Basics of Shoemaking Stitching
▷ 13.4. Assembling and Sewing the Uppers
▷ 13.5. Lasting the Uppers
▷ 13.6. Sole construction
▷ 13.7. Heel construction
▷ 13.8. Heel and Sole Edge Finishing
▷ 13.9. Shoe Last Removal
▷ 13.10. Insole Cover Application
▷ 13.11. Finishing
Part 14: Shoe Making Process - Oxford Model
▷ 14.1. Overview of the Cut Pieces
▷ 14.2. Overview of the Skived Pieces
▷ 14.3. Assembling and Sewing the Uppers
▷ 14.4. Applying pre-made Rubber Sole
Part 15: Shoe Making Process - Loafer Model
▷ 15.1. Overview of the Cut Pieces
▷ 15.2. Overview of the Skived Pieces
▷ 15.3. Assembling and Sewing the Uppers
▷ 15.4. Creating the Insole and Sole Pattern
▷ 15.5. Lasting the Uppers
▷ 15.6. Sole construction
▷ 15.7. Attaching the Sole
▷ 15.8. Insole Cover Application
Part 16: Shoe Making Process - Ballerina Model
▷ 16.1. Overview of the Cut Pieces
▷ 16.2. Overview of the Skived Pieces
▷ 16.3. Assembling and Sewing the Uppers
▷ 16.4. Creating the insole pattern
▷ 16.5. Lasting the Uppers
▷ 16.6. Sole Application
▷ 16.7. Insole Cover Application
Part 17: Shoe Making Process - High Heels (Court)
▷ 17.1. Overview of the Cut Pieces
▷ 17.2. Overview of the Skived Pieces
▷ 17.3. Assembling and Sewing the Uppers
▷ 17.4. Heel Cover Application
▷ 17.5. Creating the Sole Pattern
▷ 17.6. Lasting the Uppers
▷ 17.7. Sole Making
▷ 17.8. Sole Application
▷ 17.9. Heel Application
▷ 17.10. Insole Cover Application
Part 18: Shoe Making Process - Sandals
▷ 18.1. Overview of the Cut Pieces
▷ 18.2. Assembling and Sewing the Uppers
▷ 18.3. Preparing the bottoms
▷ 18.4. Lasting the uppers
▷ 18.5. Sole Application
▷ 18.6. Heel Application
▷ 18.7. Insole Cover Application
Part 19: Shoe Making Process - Sneakers
▷ 19.1. Overview of the Cut Pieces
▷ 19.2. Overview of the Skived Pieces
▷ 19.3. Assembling and Sewing the Uppers
▷ 19.4. Creating the insole pattern
▷ 19.5. Lasting the uppers
▷ 19.6. Sole application
▷ Stitching the sole: demonstration
▷ 19.7. Insole Cover Application
Part 20: Shoe Making Process - Ankle Boots
Recommended Materials for Ankle Boot Uppers
▷ 20.1. Assembling and Sewing the Uppers
▷ 20.2. Creating the insole
▷ 20.3. Lasting the uppers
▷ 20.4. Midsole application
▷ 20.5. Midsole Hand-Stitching
▷ 20.6. Sole application and Hand-Stitching
Part 21: Shoe Making Process - Calf Boots
▷ 21.1. Overview of the Cut Pieces
▷ 21.2. Overview of the Skived Pieces
▷ 21.3. Assembling and Sewing the Uppers
▷ 21.4. Lasting the uppers
▷ 21.5. Sole application
▷ 21.6. Insole Cover Application
🎁 PDF Shop Patterns
Whole Shop Patterns
Dyed Oxford Course
Oxford Patterns
▷ 1. Main materials needed
▷ 2. Overview of the patterns
▷ 3. Overview of the Cut Pieces
▷ 4. Overview of the Skived Pieces
▷ 5. Dyeing the Pieces
▷ 6. Assembling and Sewing the Uppers
▷ 7. Lasting the Uppers
▷ 8. Adding Shading Effects
▷ 9. Sole construction
▷ 10. Heel construction
▷ 11. Edge Finishing – Smoothing Heel and Sole
▷ 12. Edge Finishing – Dyeing and Waxing Heel and Sole
▷ 13. Finishing the Bottom of the Sole
▷ 14. Finishing the Uppers
▷ 15. Shoe Last Removal
▷ 16. Insole Cover Application
High Top Sneakers
High Top Sneakers Patterns
▷ 1. Main materials needed
▷ 2. Overview of the patterns
▷ 3. Overview of the Cut Pieces
▷ 4. Overview of the Skived Pieces
▷ 5. Dyeing the Pieces
▷ 6. Assembling and Sewing the Uppers
▷ 7. Creating the insole pattern
▷ 8. Lasting the Uppers
▷ 9. Adding Shading Effects
▷ 10. Sole application
▷ 11. Sole stitching
▷ 12. Insole Cover Application
Moc Boots
Moc Boots Patterns
▷ 1. Main materials needed
▷ 2. Overview of the patterns
▷ 3. Overview of the Cut Pieces
▷ 4. Overview of the Skived Pieces
▷ 5. Assembling and Sewing the Uppers
▷ 6. Creating the insole
▷ 7. Lasting the Uppers
▷ 8. Sole construction
¿Por qué elegir VALEVRO?
¡Descubrirás no sólo cómo hacer zapatos, sino también por qué cada paso es importante!
En Valevro, no se trata solo de crear patrones o zapatos, sino de comprender la zapatería desde dentro. Aprenderás cómo se conectan los patrones con la construcción, cómo los materiales influyen en el resultado y cómo dar vida a tus propios diseños.
¡Nuestros estudiantes lo dicen mejor!
Más de 300 estudiantes felices en todo el mundo
Excelente 4.9/5


Customer Creations
Real results from customers who followed the course.


James Tom
Highly recommend this sellers shoe making


Andrea P.
Very practical and well explained. I enjoyed every step.


Alicia
Boots I made from your course. I love them and they are super comfy.


Dan Mallais
You’re the GOAT!


Krystal C.
I recently finished my very first pair of shoes and I am quite happy with them.
James Tom
Highly recommend this sellers shoe making
Andrea P.
Very practical and well explained. I enjoyed every step.
Alicia
Boots I made from your course. I love them and they are super comfy.
Dan Mallais
You’re the GOAT!
Krystal C.
I recently finished my very first pair of shoes and I am quite happy with them.

Conozca a su instructor
¡Hola! ¡Soy Justin! Soy el fundador de VALEVRO y un artesano de toda la vida, apasionado por el calzado y el patronaje. Llevo más de 10 años trabajando como patronista y zapatero profesional. Durante este tiempo, he desarrollado un profundo conocimiento del oficio: diseñar, patronear y confeccionar zapatos que no solo lucen hermosos, sino que también calzan a la perfección.
Mi misión ahora es empoderar e inspirar a otros a seguir sus sueños creativos, tal como lo hice yo cuando descubrí el arte de hacer zapatos. Me encanta compartir las habilidades y técnicas que he desarrollado para que tú también puedas hacer realidad tus ideas y convertirte en el zapatero que quieres ser.
Preguntas frecuentes
¡Encuentra las respuestas abajo! Si tienes alguna otra pregunta, escríbenos a office@valevro.com😊
¿Son estos cursos en línea o sólo vídeos instructivos?
Estos cursos en línea son completos y cuentan con videolecciones detalladas paso a paso. Cada curso ofrece una experiencia de aprendizaje estructurada y todas las lecciones están pregrabadas. Esto te permite aprender a tu propio ritmo y acceder al material en línea cuando te convenga.
¿Necesito alguna experiencia previa para unirme al curso?
¡No! Cada curso está diseñado tanto para principiantes como para creadores experimentados. Aprenderás todo paso a paso, desde cero.
¿Qué aprenderé en el curso de Patronaje?
Aprenderás a crear patrones para 9 modelos esenciales de calzado. Dominar estos 9 modelos te proporcionará los conocimientos básicos para crear patrones para cualquier estilo de calzado y aplicar tus habilidades a un sinfín de posibilidades de diseño.
¿Qué aprenderé en el curso de Zapatería?
Aprende a crear zapatos de principio a fin. Al finalizar, tendrás los conocimientos y las habilidades para dar vida a cualquier modelo de zapato.
¿Qué aprenderé en el curso de Patronaje y Calzado?
En el curso de Patronaje y Calzado, adquirirás una comprensión completa tanto del patronaje como de la zapatería. Aprenderás a diseñar patrones para cualquier zapato y a darles vida con tus propias manos.
¿Necesito un software especial para crear patrones de zapatos?
¡No necesitas ningún software! El curso está diseñado para enseñar técnicas de patronaje manual, para que puedas crear patrones fácilmente usando herramientas básicas como una regla, un lápiz, un cúter, etc.
¿Cuanto tiempo se tarda en completar el curso?
Se estima que el curso completo ( Curso de Patronaje y Calzado ) se completa en aproximadamente 3 meses, con 1 hora y 30 minutos de aprendizaje diario. Sin embargo, puedes ir a tu propio ritmo, así que siéntete libre de dedicar más o menos tiempo según tu horario y preferencias de aprendizaje.
¿Tendré acceso de por vida al curso?
¡Sí! Una vez que te inscribas, tendrás acceso de por vida a todas las lecciones, incluidas las futuras actualizaciones.
¿Recibiré apoyo si tengo preguntas durante el curso?
¡Sí! Siempre eres bienvenido. Tendrás acceso a soporte por correo electrónico para cualquier pregunta que tengas durante el proceso. Te acompañaré en cada paso hasta que lo entiendas todo por completo.