Complete Online Shoemaking Course
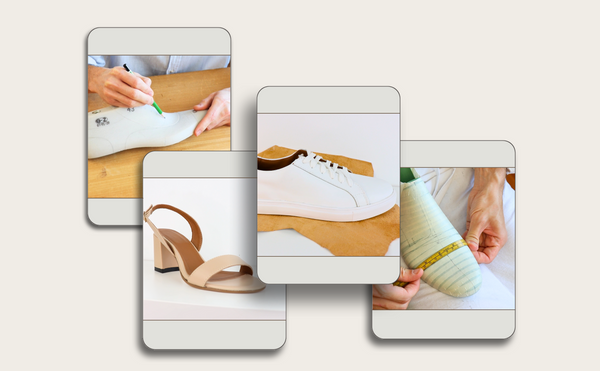
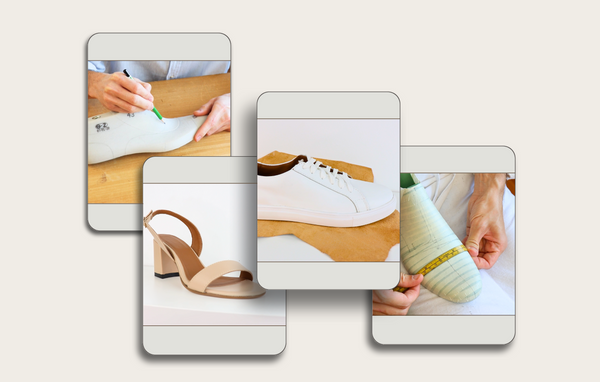
Go from beginner to shoemaker with step-by-step lessons that take you through the entire process—from design to a finished pair.
✓ Learn to create patterns for all iconic shoe styles: Oxford, Derby, Loafers, High Heels, Sneakers, Sandals, Ballerinas, Ankle Boots, Calf Boots and more.
✓ Learn to craft every shoe style using multiple methods — from cemented construction to Stitchdown.
✓ Learn to apply shoemaking finishing techniques.
Learn shoemaking step by step from scratch with VALEVRO’s complete online course. Tools and shoe lasts included. Join now!
What You'll Learn
In this course, you’ll explore the step-by-step process of making shoes from start to finish.
You’ll learn how to:
-
Create patterns for Oxford, Derby, Loafers, High Heels, Sneakers, Sandals, Ballerinas, Ankle Boots, and Calf Boots
-
Understand shoe anatomy and last preparation
-
Cut, assemble, and construct every shoe by hand
-
Apply finishing techniques used by professional shoemakers
By the end of the course, you’ll be able to design, pattern, and handcraft any shoe model with confidence.
What’s Included
When you enroll, you’re not just getting access to expert instruction—you’ll receive a complete shoemaking toolkit delivered to your door.
Included with your course enrollment:
✅ A pair of professional shoe lasts (in your selected size)
✅ High-quality shoemaking tools
✅ Essential shoemaking materials
✅ Lifetime access to all lessons and future course updates
✅ Access to 9 complete patternmaking and shoemaking projects
✅ Support via our student community and email
We deliver your tools and lasts directly to your doorstep—so you can start crafting without delay.
Why Choose Valevro?
At Valevro, we do more than just teach—you create. Our course was built with aspiring artisans and future footwear designers in mind.
Here’s why students from around the world trust Valevro:
-
🧠 All skill levels welcome — no experience needed
-
🧰 Learn by doing — build real shoes from start to finish
-
🎓 Expert guidance — based on years of professional shoemaking
-
🌍 Global access — take the course from anywhere, on your schedule
-
🎁 Free tools & lasts — everything you need to begin your journey
Unlike other courses, ours is focused on empowering you with repeatable, professional-level techniques that will last a lifetime.
Whether you're dreaming of launching your own line or just making shoes for yourself—this is your start.
Testimonials
Our students are turning passion into skill—one pair of shoes at a time. Here's what they’re saying:
"I had zero experience, but I made my first pair of loafers within a few weeks. The instructions are super clear and the patterns are gold."
— Anna T., USA
"Loved getting my toolkit in the mail! Everything is so well explained, and now I feel confident to design and make my own styles."
— Jake M., UK
"It’s the most complete shoemaking course I’ve found. It truly takes you from A to Z."
— Louise R., France
✨ Ready to start your shoemaking journey? Join hundreds of students and begin creating your own shoes from home!
Frequently Asked Questions
How long is the course?
The course is designed to be completed in 3 months, but you’ll get lifetime access so you can learn at your own pace.
Do I need any experience?
Not at all! The course is built for complete beginners, but also suits intermediate makers who want to refine their skills.
Is everything included?
Yes! You'll receive a full shoemaking toolkit, materials, and a pair of professional shoe lasts in your size—plus all digital course content.
Can I get a refund if I change my mind?
Absolutely. We offer a 3-day full refund policy after purchase, no questions asked.
Enroll Now and Start Creating
Whether you're an aspiring shoemaker, creative hobbyist, or fashion entrepreneur—Valevro gives you everything you need to turn your ideas into real, wearable shoes.
Start learning shoemaking today.
Craft your future, one step at a time.
See more products in our website: https://valevro.com/collections/shoemaking-tools-and-materials
Online Shoemaking Course
Watch the course introduction 👇
Explore the plans
Begin your shoemaking journey today!


COURSE CONTENT
See the full structure of the course with all modules and lessons.
Pattern Making Course
Shoemaking Course
Pattern Making & Shoemaking Course
Introductions
📄Thank You for Enrolling – Let’s Get Started! 👞✨
📄Your Course & Tool Kits
📄 📩 Contact me
▷ Needed tools for Pattern Making
Part 1: Pattern Making - Derby Model
Part 1: Pattern Making - Derby Model
▷ 1.1. Wrapping the shoe last
▷ 1.2. Establishing the main points and lines of the shoe last
▷ 1.3. Drawing the design lines of the model
▷ 1.4. Transferring shoe last shells in 2D
▷ 1.5. Obtaining the Mean Forme
▷ 1.6. Placing the Mean Forme in the xOy coordinate system
▷ 1.7. Transferring the design lines
▷ 1.8. Technical drawing
▷ 1.9. Extracting the patterns from technical drawing
▷ 1.10. Getting the final patterns on cardboard
Part 2: Pattern Making - Oxford Model
▷ 2.1. Efficient Use of a Pre-Existing Mean Forme
▷ 2.2. Placing the Mean Form in the xOy coordinate system
▷ 2.3. Establishing the main lines of the model
▷ 2.4. Drawing the design lines of the model
▷ 2.5. Technical drawing
▷ 2.6. Extracting the patterns from technical drawing
▷ 2.7. Getting the final patterns on cardboard
Show More
Part 3: Pattern Making - Loafer Model
▷ 3.1. Wrapping the shoe last
▷ 3.2. Establishing the main points and lines of the shoe last
▷ 3.3. Drawing the design lines of the model
▷ 3.4. Transferring shoe last shells in 2D
▷ 3.5.Technical drawing Loafer
▷ 3.6. Extracting the patterns from technical drawing
▷ 3.7. Getting the final patterns on cardboard
Part 4: Pattern Making - Ballerina Shoe Model
▷ 4.1. Wrapping the shoe last
▷ 4.2. Establish the main points and lines
▷ 4.3. Transferring shoe last shells in 2D
▷ 4.4. Technical drawing
▷ 4.5. Extracting the upper and lining patterns from technical drawing
▷ 4.6. Creating and extracting the reinforcements patterns
▷ 4.7. Getting the final patterns on cardboard
Part 5: Pattern Making - High Heels Shoes (Court Heels)
▷ 5.1. Wrapping the shoe last
▷ 5.2. Establish the main points and lines
▷ 5.3. Transferring shoe last shells in 2D
▷ 5.4. Obtaining the Mean Forme
▷ 5.5. Placing the Mean Forme in the xOy axes system
▷ 5.6. Technical drawing
▷ 5.7. Getting the upper and lining patterns from technical drawing
▷ 5.8. Creating and getting the reinforcements patterns
▷ 5.9. Creating the heel pattern
▷ 5.10. Getting the final patterns on cardboard
Part 6: Pattern Making - Sandals
▷ 6.1. wrapping shoe last
▷ 6.2. Establish the main points and lines
▷ 6.3. Drawing the design lines of the model
▷ 6.4. Transferring the pieces in 2D
▷ 6.5. Technical Drawing
▷ 6.6. Extracting the upper patterns from the technical drawing
▷ 6.7. Creating and extracting the linings
▷ 6.8. Creating and extracting the reinforcements (optional)
▷ 6.9. Creating the bottom patterns
▷ 6.10. Creating the heel pattern
▷ 6.11. Getting the final patterns on cardboard
Part 7: Pattern Making - Sneakers
▷ 7.1. Wrapping the shoe last
▷ 7.2. Establishing the main and design lines on the shoe last
▷ 7.3. Transferring shoe last shells in 2D
▷ 7.4. Obtaining the Mean Forme
▷ 7.5. Placing the Mean Form in the xOy coordinate system
▷ 7.6. Transferring the design lines
▷ 7.7. Technical drawing
▷ 7.8. Extracting the upper patterns from the technical drawing
▷ 7.9. Creating and extracting the linings
▷ 7.10. Creating and extracting the fillings and reinforcements
▷ 7.11. Getting the final patterns on cardboard
Part 8: Pattern Making - Ankle Boots
▷ 8.1. Wrapping shoe last
▷ 8.2. Establishing the main and design lines on the shoe last
▷ 8.3. Transferring shoe last shells in 2D
▷ 8.4. Obtaining the Mean Forme
▷ 8.5. Placing the Mean Form in the xOy coordinate system
▷ 8.6. Transferring the design lines
▷ 8.7. Technical drawing
▷ 8.8. Extracting the patterns from technical drawing
▷ 8.9. Getting the final patterns on cardboard
Part 9: Pattern Making - Calf High Boots
▷ 9.1. Placing the Mean Form in the xOy coordinate system
▷ 9.2. Establishing the main lines of the model
▷ 9.3. Drawing the design lines of the model
▷ 9.4. Technical drawing
▷ 9.5. Extracting the upper patterns from the technical drawing
▷ 9.6. Creating and extracting the linings
▷ 9.7. Creating and extracting the reinforcements
▷ 9.8. Getting the final patterns on cardboard
Part 10: Grading / Scaling
Download the Grading Table
▷ 10.1. Grading on the mean forme
▷ 10.2. Grading on the technical drawing
Part 11: Material Consumption
▷ 11.1. Estimating Material Consumption
Introductions
📄Thank You for Enrolling – Let’s Get Started! 👞✨
📄Your Course & Tool Kits
📄 📩 Contact me
▷ Needed tools for Pattern Making
Part 1: Material Consumption
▷ 1.1. Estimating Material Consumption
Part 2: Cutting and Skiving Leather
▷ 2.1.1. Basics of Leather Cutting
▷ 2.1.2. Basics of Lining Cutting
▷ 2.1.3. Basics of Reinforcements Cutting
▷ 2.2. Basics of Edge Skiving
Part 3: Shoe Making Process - Derby Model
▷ 3.1. Overview of the Cut Pieces
▷ 3.2. Overview of the Skived Pieces
▷ 3.3. Basics of Shoemaking Stitching
▷ 3.4. Assembling and Sewing the Uppers
▷ 3.5. Lasting the Uppers
▷ 3.6. Sole construction
▷ 3.7. Heel construction
▷ 3.8. Heel and Sole Edge Finishing
▷ 3.9. Shoe Last Removal
▷ 3.10. Insole Cover Application
▷ 3.11. Finishing
Show More
Part 4: Shoe Making Process - Oxford Model
▷ 4.1. Overview of the Cut Pieces
▷ 4.2. Overview of the Skived Pieces
▷ 4.3. Assembling and Sewing the Uppers
▷ 4.4. Applying pre-made Rubber Sole
Part 5: Shoe Making Process - Loafer Model
▷ 5.1. Overview of the Cut Pieces
▷ 5.2. Overview of the Skived Pieces
▷ 5.3. Assembling and Sewing the Uppers
▷ 5.4. Creating the Insole and Sole Pattern
▷ 5.5. Lasting the Uppers
▷ 5.6. Sole construction
▷ 5.7. Attaching the Sole
▷ 5.8. Insole Cover Application
Part 6: Shoe Making Process - Ballerina Model
▷ 6.1. Overview of the Cut Pieces
▷ 6.2. Overview of the Skived Pieces
▷ 6.3. Assembling and Sewing the Uppers
▷ 6.4. Creating the insole pattern
▷ 6.5. Lasting the Uppers
▷ 6.6. Sole Application
▷ 6.7. Insole Cover Application
Part 7: Shoe Making Process - High Heels (Court)
▷ 7.1. Overview of the Cut Pieces
▷ 7.2. Overview of the Skived Pieces
▷ 7.3. Assembling and Sewing the Uppers
▷ 7.4. Heel Cover Application
▷ 7.5. Creating the Sole Pattern
▷ 7.6.1. Lasting the Uppers
▷ 7.7. Sole Making
▷ 7.8. Sole Application
▷ 7.9. Heel Application
▷ 7.10. Insole Cover Application
Part 8: Shoe Making Process - Sandals
▷ 8.1. Overview of the Cut Pieces
▷ 8.2. Assembling and Sewing the Uppers
▷ 8.3. Preparing the bottoms
▷ 8.4. Lasting the uppers
▷ 8.5. Sole Application
▷ 8.6. Heel Application
▷ 8.7. Insole Cover Application
Part 9: Shoe Making Process - Sneakers
▷ 9.1. Overview of the Cut Pieces
▷ 9.2. Overview of the Skived Pieces
▷ 9.3. Assembling and Sewing the Uppers
▷ 9.4. Creating the insole pattern
▷ 9.5. Lasting the uppers
▷ 9.6. Sole application
▷ Stitching the sole: demonstration
▷ 9.7. Insole Cover Application
Part 10: Shoe Making Process - Ankle Boots
Recommended Materials for Ankle Boot Uppers
▷ 10.1. Assembling and Sewing the Uppers
▷ 10.2. Creating the insole
▷ 10.3. Lasting the uppers
▷ 10.4. Midsole application
▷ 10.5. Midsole Hand-Stitching
▷ 10.6. Sole application and Hand-Stitching
Part 11: Shoe Making Process - Calf Boots
▷ 11.1. Overview of the Cut Pieces
▷ 11.2. Overview of the Skived Pieces
▷ 11.3. Assembling and Sewing the Uppers
▷ 11.4. Lasting the uppers
▷ 11.5. Sole application
▷ 11.6. Insole Cover Application
🎁 PDF Shop Patterns
Whole Shop Patterns
Dyed Oxford Course
Oxford Patterns
▷ 1. Main materials needed
▷ 2. Overview of the patterns
▷ 3. Overview of the Cut Pieces
▷ 4. Overview of the Skived Pieces
▷ 5. Dyeing the Pieces
▷ 6. Assembling and Sewing the Uppers
▷ 7. Lasting the Uppers
▷ 8. Adding Shading Effects
▷ 9. Sole construction
▷ 10. Heel construction
▷ 11. Edge Finishing – Smoothing Heel and Sole
▷ 12. Edge Finishing – Dyeing and Waxing Heel and Sole
▷ 13. Finishing the Bottom of the Sole
▷ 14. Finishing the Uppers
▷ 15. Shoe Last Removal
▷ 16. Insole Cover Application
High Top Sneakers
High Top Sneakers Patterns
▷ 1. Main materials needed
▷ 2. Overview of the patterns
▷ 3. Overview of the Cut Pieces
▷ 4. Overview of the Skived Pieces
▷ 5. Dyeing the Pieces
▷ 6. Assembling and Sewing the Uppers
▷ 7. Creating the insole pattern
▷ 8. Lasting the Uppers
▷ 9. Adding Shading Effects
▷ 10. Sole application
▷ 11. Sole stitching
▷ 12. Insole Cover Application
Moc Boots
Moc Boots Patterns
▷ 1. Main materials needed
▷ 2. Overview of the patterns
▷ 3. Overview of the Cut Pieces
▷ 4. Overview of the Skived Pieces
▷ 5. Assembling and Sewing the Uppers
▷ 6. Creating the insole
▷ 7. Lasting the Uppers
▷ 8. Sole construction
Introductions
📄Thank You for Enrolling – Let’s Get Started! 👞✨
📄Your Course & Tool Kits
📄 📩 Contact me
▷ Needed tools for Pattern Making
Part 1: Pattern Making - Derby Model
Part 1: Pattern Making - Derby Model
▷ 1.1. Wrapping the shoe last
▷ 1.2. Establishing the main points and lines of the shoe last
▷ 1.3. Drawing the design lines of the model
▷ 1.4. Transferring shoe last shells in 2D
▷ 1.5. Obtaining the Mean Forme
▷ 1.6. Placing the Mean Forme in the xOy coordinate system
▷ 1.7. Transferring the design lines
▷ 1.8. Technical drawing
▷ 1.9. Extracting the patterns from technical drawing
▷ 1.10. Getting the final patterns on cardboard
Part 2: Pattern Making - Oxford Model
▷ 2.1. Efficient Use of a Pre-Existing Mean Forme
▷ 2.2. Placing the Mean Form in the xOy coordinate system
▷ 2.3. Establishing the main lines of the model
▷ 2.4. Drawing the design lines of the model
▷ 2.5. Technical drawing
▷ 2.6. Extracting the patterns from technical drawing
▷ 2.7. Getting the final patterns on cardboard
Show More
Part 3: Pattern Making - Loafer Model
▷ 3.1. Wrapping the shoe last
▷ 3.2. Establishing the main points and lines of the shoe last
▷ 3.3. Drawing the design lines of the model
▷ 3.4. Transferring shoe last shells in 2D
▷ 3.5.Technical drawing Loafer
▷ 3.6. Extracting the patterns from technical drawing
▷ 3.7. Getting the final patterns on cardboard
Part 4: Pattern Making - Ballerina Shoe Model
▷ 4.1. Wrapping the shoe last
▷ 4.2. Establish the main points and lines
▷ 4.3. Transferring shoe last shells in 2D
▷ 4.4. Technical drawing
▷ 4.5. Extracting the upper and lining patterns from technical drawing
▷ 4.6. Creating and extracting the reinforcements patterns
▷ 4.7. Getting the final patterns on cardboard
Part 5: Pattern Making - High Heels Shoes (Court Heels)
▷ 5.1. Wrapping the shoe last
▷ 5.2. Establish the main points and lines
▷ 5.3. Transferring shoe last shells in 2D
▷ 5.4. Obtaining the Mean Forme
▷ 5.5. Placing the Mean Forme in the xOy axes system
▷ 5.6. Technical drawing
▷ 5.7. Getting the upper and lining patterns from technical drawing
▷ 5.8. Creating and getting the reinforcements patterns
▷ 5.9. Creating the heel pattern
▷ 5.10. Getting the final patterns on cardboard
Part 6: Pattern Making - Sandals
▷ 6.1. wrapping shoe last
▷ 6.2. Establish the main points and lines
▷ 6.3. Drawing the design lines of the model
▷ 6.4. Transferring the pieces in 2D
▷ 6.5. Technical Drawing
▷ 6.6. Extracting the upper patterns from the technical drawing
▷ 6.7. Creating and extracting the linings
▷ 6.8. Creating and extracting the reinforcements (optional)
▷ 6.9. Creating the bottom patterns
▷ 6.10. Creating the heel pattern
▷ 6.11. Getting the final patterns on cardboard
Part 7: Pattern Making - Sneakers
▷ 7.1. Wrapping the shoe last
▷ 7.2. Establishing the main and design lines on the shoe last
▷ 7.3. Transferring shoe last shells in 2D
▷ 7.4. Obtaining the Mean Forme
▷ 7.5. Placing the Mean Form in the xOy coordinate system
▷ 7.6. Transferring the design lines
▷ 7.7. Technical drawing
▷ 7.8. Extracting the upper patterns from the technical drawing
▷ 7.9. Creating and extracting the linings
▷ 7.10. Creating and extracting the fillings and reinforcements
▷ 7.11. Getting the final patterns on cardboard
Part 8: Pattern Making - Ankle Boots
▷ 8.1. Wrapping shoe last
▷ 8.2. Establishing the main and design lines on the shoe last
▷ 8.3. Transferring shoe last shells in 2D
▷ 8.4. Obtaining the Mean Forme
▷ 8.5. Placing the Mean Form in the xOy coordinate system
▷ 8.6. Transferring the design lines
▷ 8.7. Technical drawing
▷ 8.8. Extracting the patterns from technical drawing
▷ 8.9. Getting the final patterns on cardboard
Part 9: Pattern Making - Calf High Boots
▷ 9.1. Placing the Mean Form in the xOy coordinate system
▷ 9.2. Establishing the main lines of the model
▷ 9.3. Drawing the design lines of the model
▷ 9.4. Technical drawing
▷ 9.5. Extracting the upper patterns from the technical drawing
▷ 9.6. Creating and extracting the linings
▷ 9.7. Creating and extracting the reinforcements
▷ 9.8. Getting the final patterns on cardboard
Part 10: Grading / Scaling
Download the Grading Table
▷ 10.1. Grading on the mean forme
▷ 10.2. Grading on the technical drawing
Part 11: Material Consumption
▷ 11.1. Estimating Material Consumption
Shoemaking Equipment and Tools You Will Need
📄 1 - Main Tools Commonly Used in Shoemaking
📄 2 - Main Materials Commonly Used in Shoemaking
📄 3 - Main Shoemaking Adhesives-Glues
▷ 4 - Basics of Shoemaking Stitching
📄 ❓Where to Find Shoemaking Supplies
Part 12: Cutting and Skiving Leather
▷ 12.1.1. Basics of Leather Cutting
▷ 12.1.2. Basics of Lining Cutting
▷ 12.1.3. Basics of Reinforcements Cutting
▷ 12.2. Basics of Edge Skiving
Part 13: Shoe Making Process - Derby Model
▷ 13.1. Overview of the Cut Pieces
▷ 13.2. Overview of the Skived Pieces
▷ 13.3. Basics of Shoemaking Stitching
▷ 13.4. Assembling and Sewing the Uppers
▷ 13.5. Lasting the Uppers
▷ 13.6. Sole construction
▷ 13.7. Heel construction
▷ 13.8. Heel and Sole Edge Finishing
▷ 13.9. Shoe Last Removal
▷ 13.10. Insole Cover Application
▷ 13.11. Finishing
Part 14: Shoe Making Process - Oxford Model
▷ 14.1. Overview of the Cut Pieces
▷ 14.2. Overview of the Skived Pieces
▷ 14.3. Assembling and Sewing the Uppers
▷ 14.4. Applying pre-made Rubber Sole
Part 15: Shoe Making Process - Loafer Model
▷ 15.1. Overview of the Cut Pieces
▷ 15.2. Overview of the Skived Pieces
▷ 15.3. Assembling and Sewing the Uppers
▷ 15.4. Creating the Insole and Sole Pattern
▷ 15.5. Lasting the Uppers
▷ 15.6. Sole construction
▷ 15.7. Attaching the Sole
▷ 15.8. Insole Cover Application
Part 16: Shoe Making Process - Ballerina Model
▷ 16.1. Overview of the Cut Pieces
▷ 16.2. Overview of the Skived Pieces
▷ 16.3. Assembling and Sewing the Uppers
▷ 16.4. Creating the insole pattern
▷ 16.5. Lasting the Uppers
▷ 16.6. Sole Application
▷ 16.7. Insole Cover Application
Part 17: Shoe Making Process - High Heels (Court)
▷ 17.1. Overview of the Cut Pieces
▷ 17.2. Overview of the Skived Pieces
▷ 17.3. Assembling and Sewing the Uppers
▷ 17.4. Heel Cover Application
▷ 17.5. Creating the Sole Pattern
▷ 17.6. Lasting the Uppers
▷ 17.7. Sole Making
▷ 17.8. Sole Application
▷ 17.9. Heel Application
▷ 17.10. Insole Cover Application
Part 18: Shoe Making Process - Sandals
▷ 18.1. Overview of the Cut Pieces
▷ 18.2. Assembling and Sewing the Uppers
▷ 18.3. Preparing the bottoms
▷ 18.4. Lasting the uppers
▷ 18.5. Sole Application
▷ 18.6. Heel Application
▷ 18.7. Insole Cover Application
Part 19: Shoe Making Process - Sneakers
▷ 19.1. Overview of the Cut Pieces
▷ 19.2. Overview of the Skived Pieces
▷ 19.3. Assembling and Sewing the Uppers
▷ 19.4. Creating the insole pattern
▷ 19.5. Lasting the uppers
▷ 19.6. Sole application
▷ Stitching the sole: demonstration
▷ 19.7. Insole Cover Application
Part 20: Shoe Making Process - Ankle Boots
Recommended Materials for Ankle Boot Uppers
▷ 20.1. Assembling and Sewing the Uppers
▷ 20.2. Creating the insole
▷ 20.3. Lasting the uppers
▷ 20.4. Midsole application
▷ 20.5. Midsole Hand-Stitching
▷ 20.6. Sole application and Hand-Stitching
Part 21: Shoe Making Process - Calf Boots
▷ 21.1. Overview of the Cut Pieces
▷ 21.2. Overview of the Skived Pieces
▷ 21.3. Assembling and Sewing the Uppers
▷ 21.4. Lasting the uppers
▷ 21.5. Sole application
▷ 21.6. Insole Cover Application
🎁 PDF Shop Patterns
Whole Shop Patterns
Dyed Oxford Course
Oxford Patterns
▷ 1. Main materials needed
▷ 2. Overview of the patterns
▷ 3. Overview of the Cut Pieces
▷ 4. Overview of the Skived Pieces
▷ 5. Dyeing the Pieces
▷ 6. Assembling and Sewing the Uppers
▷ 7. Lasting the Uppers
▷ 8. Adding Shading Effects
▷ 9. Sole construction
▷ 10. Heel construction
▷ 11. Edge Finishing – Smoothing Heel and Sole
▷ 12. Edge Finishing – Dyeing and Waxing Heel and Sole
▷ 13. Finishing the Bottom of the Sole
▷ 14. Finishing the Uppers
▷ 15. Shoe Last Removal
▷ 16. Insole Cover Application
High Top Sneakers
High Top Sneakers Patterns
▷ 1. Main materials needed
▷ 2. Overview of the patterns
▷ 3. Overview of the Cut Pieces
▷ 4. Overview of the Skived Pieces
▷ 5. Dyeing the Pieces
▷ 6. Assembling and Sewing the Uppers
▷ 7. Creating the insole pattern
▷ 8. Lasting the Uppers
▷ 9. Adding Shading Effects
▷ 10. Sole application
▷ 11. Sole stitching
▷ 12. Insole Cover Application
Moc Boots
Moc Boots Patterns
▷ 1. Main materials needed
▷ 2. Overview of the patterns
▷ 3. Overview of the Cut Pieces
▷ 4. Overview of the Skived Pieces
▷ 5. Assembling and Sewing the Uppers
▷ 6. Creating the insole
▷ 7. Lasting the Uppers
▷ 8. Sole construction


Why Choose VALEVRO?
You’ll discover not only how to make shoes, but why each step matters!
✓ Learn how patterns connect to construction
✓ Learn how to create professional shoe patterns
✓ Learn how to make shoes step by step from scratch
OUR STUDENTS SAY IT BETTER!
Over 300 happy students worldwide
Excellent 4.9/5


Customer Creations
Real results from customers who followed the course.


James Tom
Highly recommend this sellers shoe making


Andrea P.
Very practical and well explained. I enjoyed every step.


Alicia
Boots I made from your course. I love them and they are super comfy.


Dan Mallais
You’re the GOAT!


Krystal C.
I recently finished my very first pair of shoes and I am quite happy with them.
James Tom
Highly recommend this sellers shoe making
Andrea P.
Very practical and well explained. I enjoyed every step.
Alicia
Boots I made from your course. I love them and they are super comfy.
Dan Mallais
You’re the GOAT!
Krystal C.
I recently finished my very first pair of shoes and I am quite happy with them.

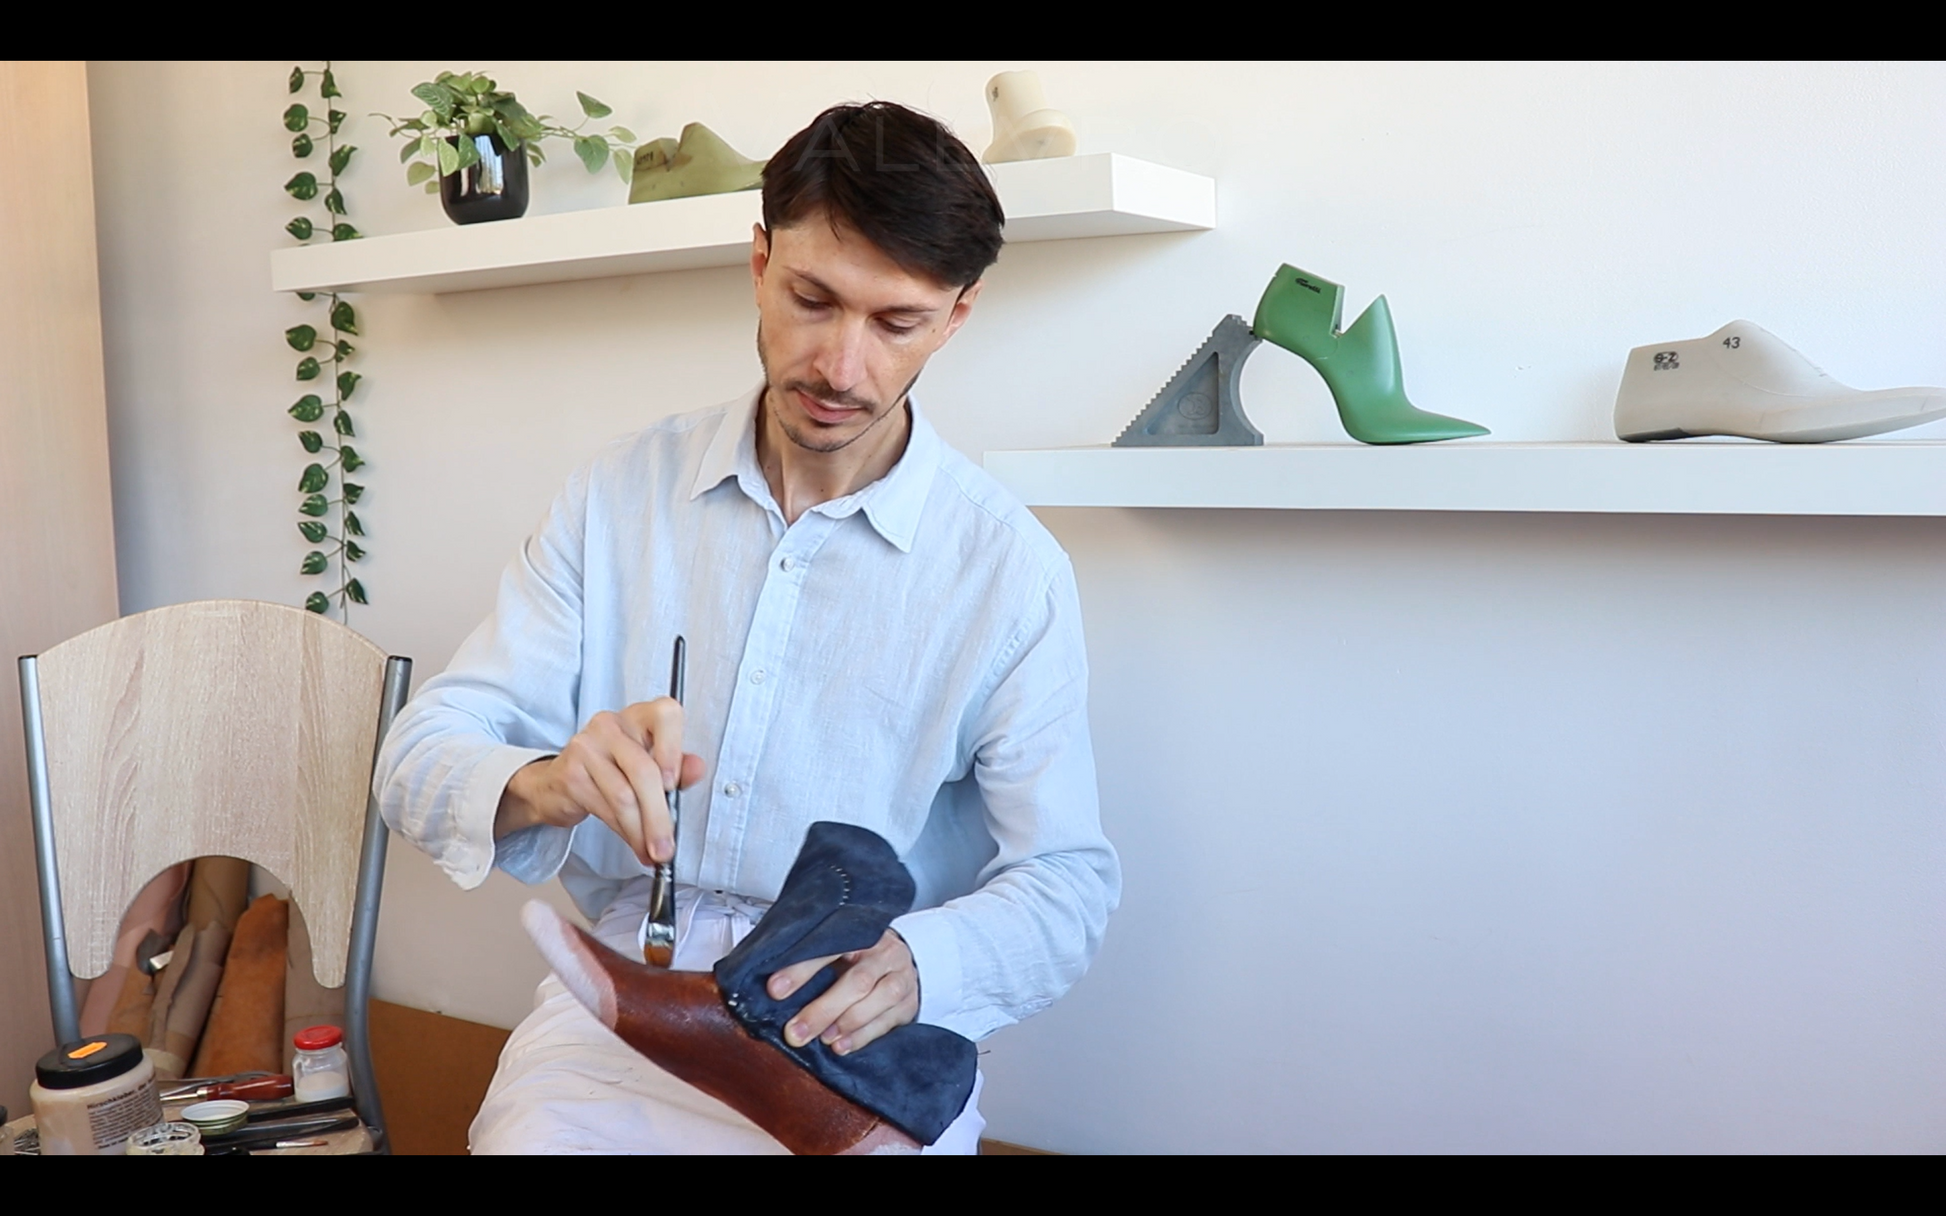
Meet Your Instructor
Hi! I'm Justin! I’m the founder of VALEVRO and a lifelong craftsman with a passion for shoemaking and patternmaking. I’ve been a professional pattern maker and shoemaker for over 10 years. Over this time, I’ve developed a deep understanding of the craft—designing, patternmaking, and constructing shoes that not only look beautiful but also fit perfectly.
My mission now is to empower and inspire others to follow their creative dreams—just as I did when I first discovered the art of making shoes. I love sharing the skills and techniques I’ve developed so you too can bring your ideas to life and become the shoemaker you want to be.
Frequently Asked Questions
Find answers below! If you have any other questions, feel free to reach out at office@valevro.com
Are these online courses or just instructional videos?
These are comprehensive online courses with detailed, step-by-step video lessons. Each course offers a structured learning experience, and all lessons are pre-recorded. This allows you to learn at your own pace, accessing the material online whenever it suits you.
Do I need any prior experience to join the course?
No! Each course is designed for beginners and experienced makers alike. You’ll learn everything step by step - from scratch.
What will I learn in the Patternmaking course?
You’ll learn how to create patterns for 9 essential shoe models. Mastering these 9 models will give you the foundational knowledge to create patterns for any shoe style and apply your skills to endless design possibilities.
What will I learn in the Shoemaking course?
Learn how to craft shoes from start to finish. By the end, you'll have the knowledge and skills to bring any shoe model to life.
What will I learn in the Patternmaking & Shoemaking course?
In the Patternmaking & Shoemaking course, you'll gain a full understanding of both patternmaking and shoemaking. You'll learn how to design patterns for any shoe and bring them to life with your own hands.
Do I need special software to create shoe patterns?
No, you won’t need any software! The course is designed to teach hand pattern-making techniques, so you can easily create patterns using just basic tools like a ruler, pencil, craft knife, and others.
How long does the course take to complete?
The full course - Patternmaking and Shoemaking Course- is estimated to be completed in about 3 months with 1 hour and 30 minutes of learning per day. However, you can go at your own pace, so feel free to take more or less time based on your schedule and learning preferences.
Do I get lifetime access to the course?
Yes! Once you enroll, you’ll have lifetime access to all lessons, including future updates.
Will I get support if I have questions during the course?
Yes! You're always welcome. You'll have access to support via email for any questions you have along the way. I’ll be with you every step of the way until you fully understand everything.