How to Make a Derby Shoe
Introduction
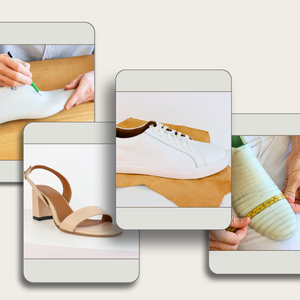
Derby shoes are a timeless classic in men’s footwear, known for their open lacing system and versatile style. Whether you want a polished, formal look or a more rugged, casual design, Derby shoes are an excellent choice for any wardrobe. In this guide, I’ll walk you through each step of making your own Derby shoes, from choosing the right materials to the final polish.
Creating a pair of Derby shoes requires a mix of precision, craftsmanship, and the right tools.
👉 In my Online Shoemaking Course, I teach you step-by-step how to make Derbys, from patternmaking to crafting the final shoes. If you want to take your skills to the next level, check it out!
1. Understanding the Derby Shoe Design
Derby shoes are defined by their open lacing system, where the quarters / eyelet facings are stitched on top of the vamp, creating a more relaxed, comfortable fit. This design makes them easier to put on and take off compared to the more formal Oxford shoe.


Key Features of a Derby Shoe:
- Open lacing system for a comfortable fit
- Separate quarters stitched over the vamp
- Sturdy, supportive construction for long-lasting wear
- Versatile style suitable for both formal and casual wear
Common Derby shoe styles include:
- Plain Toe – Clean, minimal design
- Cap Toe – Extra piece of leather over the toe for durability
-
Brogue Derby – Features decorative perforations for added style
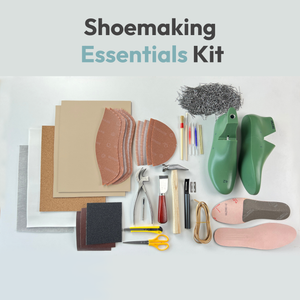
2. Tools and Materials You’ll Need
To make a high-quality pair of Derby shoes, you’ll need a few essential tools and materials. Here’s a basic checklist:
Tools:
-
Lasting pincers

-
Shoemaking hammer

-
Leathercraft tool knife

-
Leather Safety Beveler

-
Hole punch for eyelets

-
Marking pens for leather

-
Iron nails for hand lasting

Materials:
- Leather for uppers and linings
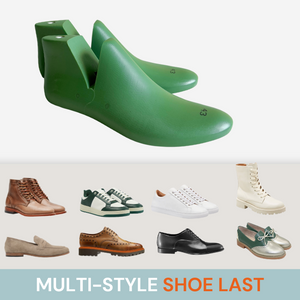
- Shoe lasts
- Adhesive
- Insoles (Texon or leather)
- Outsoles (rubber or leather)
- Toe puff & heel counter
- Thread
- Laces
You can find many of these tools and materials in my shop if you’re looking for professional-grade supplies:
👉 Shoemaking Tools and Materials
3. Creating the Shoe Pattern
Every great Derby shoe starts with a precise and well-crafted pattern. If you're not ready to draft one from scratch, you can use pre-made digital patterns available in all 9 sizes, ready to print on A4 or Letter paper.
👉Pre-made patterns
Alternatively, you can learn how to design your own patterns step by step in my dedicated patternmaking course. By the end, you’ll have the skills to create patterns for any type of shoe.
👉Footwear patternmaking course
Steps:
- Choose a shoe last that matches your foot size.
- Create the patterns on the shoe last or Print the Pre-made patterns on your preferred paper size (A4 or US Letter).
Pro Tip: Make sure your patterns include allowances for seams and reinforcements.
4. Cutting the Leather and Preparing the Upper
Once your pattern is ready, it’s time to cut the leather. This step is crucial for achieving a clean, professional finish.
Steps:
- Lay the pattern pieces on the leather, aligning with the grain.
- Use a sharp leather cutting knife for precise cuts.
- Skive the edges where necessary to reduce bulk when stitching.
- Consider adding brogue perforations if you want a more decorative look.
5. Assembling the Upper

This is where your shoe starts to take shape — you'll assemble the key components that form the main body of the shoe.
Some of the Steps:
- Sew the lining pieces of the quarters and vamp together.
- Stitch the outer quarters to the vamp, ensuring clean, straight seams.
- Insert reinforcements like eyelet reinforcements for added structure and durability.
- Punch holes for the eyelets and add metal grommets if desired.
- Finish and smooth the edges for a polished, professional appearance.
6. Lasting the Shoe


Lasting is the process of shaping the leather upper over the shoe last to create the final form of your shoe.
Steps:
- Pull the upper tightly over the last, using lasting pincers to secure the fit.
- Nail or staple the leather to the insole to hold it in place.
7. Adding the Sole and Heel


This is where your Derby shoes get their final structure and durability.
Steps:
- Attach the sole using strong adhesive or stitching, depending on your style preference.
- Trim the excess sole material and sand the edges for a clean finish.
- Attach the heel and add a top lift for added durability.
8. Final Touches and Finishing

The final steps include polishing your shoes and adding the laces for a complete, professional look.
Steps:
- Clean and condition the leather.
- Polish to a high shine or matte finish, depending on your style.
-
Lace up your shoes and try them on!
Ready to dive deeper? Learn how to make your own shoes and patterns with our step-by-step online course!
👉 Patternmaking and Shoemaking Online Course