How to Make Calf Boots or Knee-High Boots
How to Make Calf Boots or Knee-High Boots – Step-by-Step Shoemaking Guide
Calf boots and knee-high boots are bold, stylish, and functional. Whether you’re aiming for a sleek leather riding boot or a fashionable high-shaft design, handmade tall boots are a rewarding challenge for any shoemaker. They offer more room for creative design, structure, and visual impact.
In this guide, I’ll walk you through how to make your own tall boots — from preparing the pattern to shaping the upper and attaching the sole and heel.
Making calf and knee-high boots requires attention to fit, proportion, and strong construction.
👉 In my Online Shoemaking Course, I teach you step-by-step how to make Calf boots or Knee-High Boots, from patternmaking to crafting the final shoes. If you want to take your skills to the next level, check it out!
1. Understanding Tall Boot Design
Tall boots typically rise to the mid-calf or just below the knee, providing both warmth and style. They can be casual, elegant, or rugged — and are worn year-round with pants, skirts, or layered outfits.
Key Features of Calf and Knee-High Boots:
- High upper shaft extending above the ankle
- Reinforced toe and heel
- Side or back closure (zip, laces, or pull-on)
- Structured sole with optional heel
Common Tall Boot Styles Include:
-
Riding Boots – Flat, equestrian-style, often with a zipper

-
Heeled Knee Boots – Fashion-forward with stacked heel

-
Combat or Military Boots – Laced up and durable

-
Western-Inspired Boots – With pull tabs and angled heels

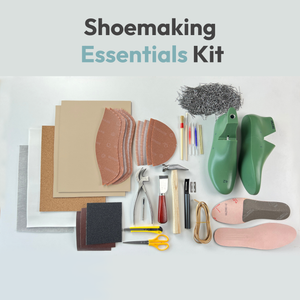
2. Tools and Materials You’ll Need
Since tall boots require more leather and structural support, you’ll need strong materials and the right tools.
Tools:
-
Lasting pincers

-
Shoemaking hammer

-
Leathercraft tool knife

-
Leather Safety Beveler

-
Hole punch for eyelets

-
Marking pens for leather

-
Iron nails for hand lasting

Materials:
- Leather or suede for the upper and shaft

- Lining leather (especially important for comfort and structure)
- Texon board or leather insole

- Toe puff and counter stiffener

- Rubber or leather outsole
- Stacked or block heel (optional)
- Side zipper, laces, or elastic gussets
- Pull tabs or loops (optional)
- Thread, adhesive, and reinforcements
You can find many of these tools and materials in my shop if you’re looking for professional-grade supplies:
👉 Shoemaking Tools and Materials
3. Creating the Boot Pattern

Patterning tall boots is about more than just height — you must consider calf circumference, shaft shape, and ankle fit.
You can learn how to design your own patterns step by step in my dedicated patternmaking course. By the end, you’ll have the skills to create patterns for any type of shoe.
👉Footwear patternmaking course
Steps:
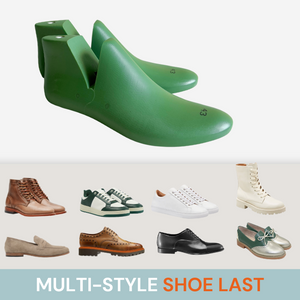
- Choose a boot last that suits your desired silhouette.
- Measure calf circumference and boot height.
- Print or draw your pattern and mark seam allowances.
- Include a zip line, pull tab, or lacing design if needed.
4. Cutting the Leather and Preparing the Upper

Tall boot leather must be firm enough to support the shaft but soft enough to mold around the leg.
Steps:
- Cut outer and lining pieces using the pattern.
- Skive the edges of shaft and foot pieces.
- Punch or pre-cut for zippers, eyelets, or elastic gussets.
- Apply reinforcement where needed (vamp, heel, topline).
- Optionally pre-assemble decorative panels, straps, or overlays.
5. Assembling the Upper

The boot upper comes together in stages — first the foot, then the shaft.
Some of the Steps:
- Sew the lining and outer leather together at the shaft.
- Assemble vamp and quarter sections.
- Insert the toe puff and heel counter.
- Attach the shaft to the lower boot section with care.
- Install the zipper or lacing panel.
- Add pull loops or decorative straps if included in your design.
6. Lasting the Boot Upper

Tall boots are lasted like ankle boots — but with more attention to fit at the ankle and instep.
Steps:
- Place the lower boot over the last.
- Pull tightly and tack or cement the leather to the insole.
- Shape the toe, heel, and waist.
- Allow to dry fully before sole attachment.
7. Adding the Sole and Heel
The sole must be strong and stable to support the taller structure of the boot.
Steps:
- Cut and sand your sole (rubber or leather).
- Apply adhesive and attach it firmly to the lasted upper.
- Trim and polish edges.
- Cement and shape the heel, layering leather if necessary.
- Add a rubber top lift for traction and wear resistance.
8. Final Touches and Finishing
This final stage brings your tall boots to life.
Steps:
- Clean any adhesive residue
- Polish leather or brush suede
- Edge-dye the sole if needed
- Add insole padding or arch support
- Zip or lace them up — and wear with pride
👢 Ready to Make Your Own Knee-High Boots?
Whether you’re aiming for a stylish block heel boot or a classic riding silhouette, tall boots are a timeless shoemaking project. Once you make your first pair, you’ll never want to go back to mass-produced.
👉 Ready to learn with full guidance? Join my Patternmaking and Shoemaking Online Course
Get access to printable boot patterns, detailed lessons, and everything you need to make beautiful custom footwear.