How to Make a Loafer Shoe
How to Make a Loafer Shoe – Step-by-Step Guide for Beginners
Loafers are the perfect mix of comfort and elegance — easy to slip on, stylish enough to dress up or down, and a must-have for any wardrobe. In this guide, I’ll show you how to make your own pair of loafers by hand, whether you’re new to shoemaking or looking to expand your skills.
👞 Want to go deeper? My Online Shoemaking Course includes loafers, Oxford shoes, Derbys, Boots, and more — with patterns, video tutorials, and lifetime access.
🧵 What Makes a Loafer?
Loafers are slip-on shoes with no laces, buckles, or fasteners. Their simple construction and minimal stitching give them a clean silhouette. They're often worn with casual or business-casual outfits and come in many styles, such as:
-
Penny Loafers – feature a strap with a small cutout across the vamp

-
Tassel Loafers – adorned with leather tassels on the upper

-
Bit Loafers – include a decorative metal bar (often popularized by Gucci)

Loafers are generally made with soft, flexible uppers and often include a moccasin-style construction or a stitched apron toe.
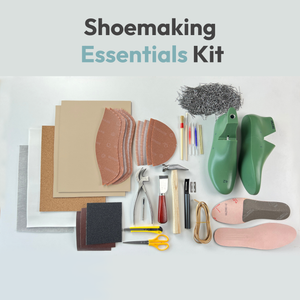
🧰 Tools & Materials You’ll Need
Whether you're making classic penny loafers or a modern slip-on, here's what you'll need:
Tools
-
Lasting pincers

-
Shoemaking hammer

-
Leathercraft tool knife

-
Leather Safety Beveler

-
Marking pens for leather

-
Iron nails for hand lasting

Materials
-
Leather for uppers and linings

-
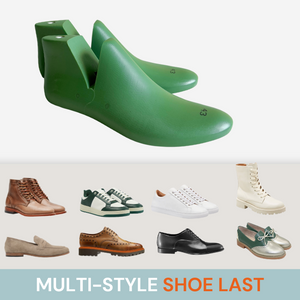
Shoe lasts

- Adhesive
-
Insoles (Texon or leather)

- Outsoles (rubber or leather)
-
Toe puff & heel counter

-
Thread
- Decorative elements like tassels or straps
📐 Loafer Pattern & Upper Construction

Every great Loafer shoe starts with a precise and well-crafted pattern. If you're not ready to draft one from scratch, you can use pre-made digital patterns available in all 9 sizes, ready to print on A4 or Letter paper.
👉Pre-made patterns
Alternatively, you can learn how to design your own patterns step by step in my dedicated patternmaking course. By the end, you’ll have the skills to create patterns for any type of shoe.
👉Footwear patternmaking course
Steps:
- Place the pattern pieces on your leather and lining, then cut carefully along the grain.
- Skive edges that will be folded or stitched.
- Stitch the lining to the upper.
- Add your decorative features — like a penny strap or tassels.
- Reinforce the heel and toe with stiffeners.
🥿 Lasting the Loafer (No Laces, No Problem)
Since loafers are slip-on shoes, proper lasting is key to a good fit.
Tips:
- Use a loafer last with a snug instep curve.
- Pull the upper firmly over the last and tack it to the insole.
- Pay special attention to the vamp tension — this ensures a secure hold when worn.
Let the lasted upper dry and set properly before continuing.
👣 Attaching the Sole


You can use a traditional leather sole, rubber outsole, or a cup sole for a more casual look.
Steps:
- Apply shoemaking adhesive to the sole and the bottom of the lasted upper.
- Press together and let dry under weight or pressure.
- If you’re using a leather sole, you can also stitch it.
- Attach the heel (if separate) and trim/sand the edges.
✨ Finishing Touches & Styling Options
- Polish the leather using cream or wax for a rich finish.
- Add a cushioned insole for extra comfort.
- Consider burnishing or edge dyeing for a refined, professional look.
Want to personalize your loafers even more? Try contrasting stitching, embossed initials, or custom tassels.
👞 Handmade Style Meets Comfort
Loafers are one of the most enjoyable shoes to make by hand — simple, fast, and endlessly customizable. Once you’ve mastered the first pair, you’ll want to make more in different colors, textures, and finishes.
👉 Ready to learn more? Join my full Online Shoemaking Course and get access to loafer patterns, step-by-step videos, and personal guidance.