How to Make Ballerina Flats or Pumps
How to Make Ballerina Flats or Pumps by Hand – A Shoemaking Guide for Beginners
Ballerina flats and pumps are elegant, comfortable, and timeless. Whether you're creating a casual slip-on for everyday wear or a sleek pair of pumps for a night out, making these shoes by hand is a fun and rewarding experience.
In this guide, I’ll show you how to make your own ballerina shoes or pumps using simple tools and materials — even if you’re just getting started.
💡 Want to learn step by step? My Online Shoemaking Course covers everything from patternmaking to finishing, and includes ballerinas, loafers, oxford, boots and more!
🩰 Ballerinas vs Pumps – What’s the Difference?

While both ballerinas and pumps are slip-on shoes, there are key differences:
- Ballerina Flats: Feature a soft sole, no heel (or a very low one), and a simple, rounded toe.
- Pumps: Include a small to moderate heel, a more structured upper, and a dressier silhouette.
The shoemaking process for both is similar — the main difference lies in the heel and the way the upper is shaped.
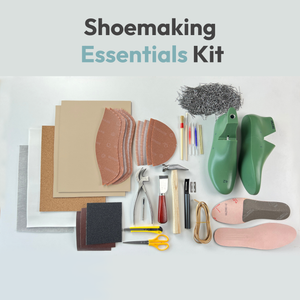
🧰 Tools & Materials You’ll Need
Whether you’re making flats or pumps, gather these essentials:
🔧 Tools
-
Lasting pincers

-
Shoemaking hammer

-
Leathercraft tool knife

-
Leather Safety Beveler

-
Marking pens for leather

-
Iron nails for hand lasting

🧵 Materials
- Soft leather, suede, or fabric (for the upper and lining)

- Heel block or stacked leather (for pumps)
- Decorative elements like bows or elastic
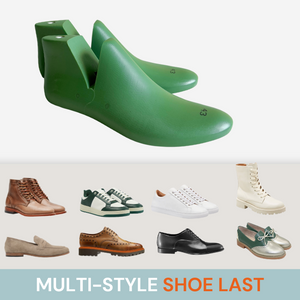
-
Shoe lasts

- Adhesive
-
Insoles (Texon or leather)

- Outsoles (rubber or leather)
-
Toe puff & heel counter

- Thread
You can find many of these tools and materials in my shop if you’re looking for professional-grade supplies:
👉 Shoemaking Tools and Materials
🖋️ Using a Pattern or Creating Your Own

You can:
- Use a pre-made pattern, perfect for beginners.
You can find ready-made patterns in multiple sizes to print at home.
👉 Printable Patterns
- Alternatively, you can learn how to design your own patterns step by step in my dedicated patternmaking course. By the end, you’ll have the skills to create patterns for any type of shoe.
👉Footwear patternmaking course
Make sure the topline is secure and shaped correctly — ballerinas often have a scooped, open shape, while pumps may have a more enclosed cut.
✂️ Cutting and Assembling the Upper
- Cut the upper and lining pieces using your pattern.
- Skive the edges of the lining and upper to reduce bulk.
- Stitch or glue the lining to the upper.
- Add any decorative elements like a bow, tassel, or strap.
- Optionally insert toe puff and heel stiffener (especially for pumps).
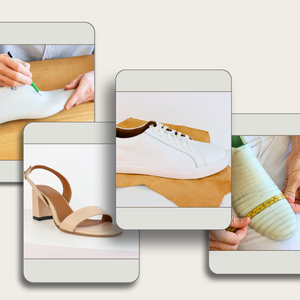
👣 Lasting: Giving the Shoe Its Shape

- Place the upper over the last.
- Pull the leather snugly and tack it into place at the toe, heel, and sides.
- Apply adhesive and smooth the upper to fit the contours of the last.
- Let the shoe dry completely on the last.
👠 Attaching the Sole (and Heel for Pumps)
- Cut or use a pre-made sole in leather or rubber.
- Glue it to the bottom of the shoe using strong shoemaking adhesive.
- For ballerinas: keep the sole flat or add a thin layer for cushion.
- For pumps: stack layers of leather or use a pre-formed heel block, then attach a rubber top lift.
Smooth and trim the edges, then polish for a clean finish.
✨ Finishing Touches
- Edge finish or dye for a clean look
- Add insoles for comfort
- Polish leather or use suede protector spray
- Add elastic binding for a snug fit (optional for ballerinas)
👗 Style Your Handmade Shoes
Handmade ballerinas and pumps can be styled with jeans, skirts, office outfits, or evening wear. Try experimenting with:
- Metallic leather
- Pastel suede
- Embossed details
- Patterned fabric
Your handmade shoes are a reflection of your personal style — and they’ll last far longer than fast fashion.
🎓 Ready to Learn More?
If you want a deeper, hands-on experience — including patternmaking, video lessons, and downloadable files — join my full online course:
👉 Join the Online Shoemaking and Patternmaking Course
Get lifetime access, all pattern templates, and step-by-step guidance to make ballerinas, pumps, loafers, and more!