How to Make High Heel Court Shoes
Design. Craft. Elevate. – How to Make High Heel Court Shoes (Stilettos) by Hand
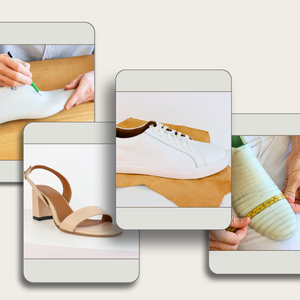
Why Heels? Why Handmade?
There’s something iconic about the high heel. Whether you call them court shoes, pumps, or simply stilettos, they’ve long symbolized elegance, power, and sophistication.
Now imagine creating your own.
From the sharp silhouette to the elevated arch and polished finish — a handmade pair of heels isn’t just fashion. It’s craftsmanship, and it starts with your hands.
🎓 Ready to take your shoemaking to a new level? My Online Shoemaking Course includes high heel patterns, video tutorials, and lifetime access.
What Are Court Shoes? (Aka Stilettos)

Court shoes, also widely referred to as stilettos or pumps, are closed-toe, slip-on shoes with a low-cut front and an elegant heel. Popular in both fashion and formal wear, they range from modest 5cm heels to dramatic 10+ cm heights.
Common features:
- Slip-on design (no laces or straps)
- Pointed or almond toe
- Stiletto or block heel (5–10 cm or more)
- Leather, suede, or glossy patent finish
Start with the Shape in Mind
Visualize the heel you want to create:
- A classic nude leather stiletto for day-to-night wear
- A bold patent red pump for confidence and flair
- A black suede court for timeless class
Everything — from the materials to the angle of the last — should match your vision.
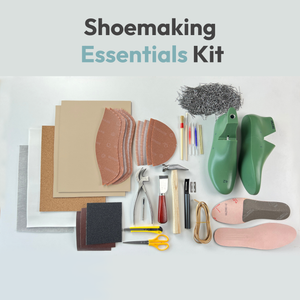
Tools & Materials You’ll Need
Tools:
-
Lasting pincers

-
Shoemaking hammer

-
Leathercraft tool knife

-
Leather Safety Beveler

-
Marking pens for leather

-
Iron nails for hand lasting

Materials:
- Soft leather, suede, or fabric (for the upper and lining)

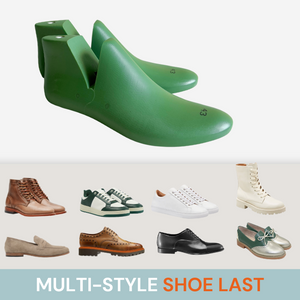
- Shoe lasts
-
Adhesive
- Outsoles (rubber or leather)
-
Toe puff & heel counter

-
Thread
- Premade Insole with Shank (plastic, steel, or fiber)
- High heel block (5–10 cm for stilettos)
You can find many of these tools and materials in my shop if you’re looking for professional-grade supplies:
👉 Shoemaking Tools and Materials
Upper Construction – Sleek and Secure
- Cut upper and lining leather using your pattern.
- Skive edges to reduce bulk.
- Reinforce the toe box and heel area with stiffeners.
- Attach lining to upper and stitch or fold the topline cleanly.
- Close the back seam and add personal design touches if desired (like a bow, strap, or texture).
Lasting and Building the Arch

Here’s where your court shoe gets its signature profile.
- Pull the upper tightly over the last.
- Use iron nails or adhesive to secure the toe, heel, and waist.
- Pay close attention to shaping the arch — this defines the heel feel.
Let the lasted upper set overnight for best results.
Attaching the Heel and Sole
The Heel:
- Choose your heel block to match the desired height (e.g., 7 cm stiletto).
- Cement and screw the heel into place at the bottom of the shank area.
- Add the heel tip (top lift).
The Sole:
- Trim your sole material to match the shape.
- Cement the outsole to the bottom.
- Sand and polish the edges for a clean, professional look.
Finishing Touches That Define Luxury
- Edge dye the outsole and topline
- Polish leather for shine, or protect suede with spray
- Add insole padding for comfort
- Optionally emboss your initials or logo inside
Design Variations You Can Try
- Classic pointed toe with 7 cm heel
- Almond toe with block heel for stability
- Slingback court with open heel
- Velvet or metallic leather for evening wear
Crafting Confidence, One Heel at a Time
High heels aren’t just shoes — they’re movement, presence, and posture.
By making your own stilettos, you’re not just learning a craft — you’re stepping into a story that’s completely yours.
🎓 Ready to Make Heels?
Join the full shoemaking course — from patterns to soles to your first perfect pair.
👉 Join the Online Shoemaking and Patternmaking Course
Includes high heels, boots, sandals and more lessons, full construction videos, and direct guidance.