How to Make Sneakers
How to Make Sneakers – Step-by-Step Shoemaking Guide for Beginners
Sneakers are the ultimate modern footwear — combining comfort, casual style, and endless customization. Whether you’re drawn to minimalist leather uppers or sporty cup soles, sneakers are a fantastic way to start (or expand) your shoemaking skills.
In this guide, I’ll walk you through the full process of crafting your own handmade sneakers, from choosing materials to attaching the sole and finishing the details.
Making sneakers by hand is a rewarding mix of creativity, precision, and craftsmanship.
👉 In my Online Shoemaking Course, I teach you step-by-step how to make Derbys, from patternmaking to crafting the final shoes. If you want to take your skills to the next level, check it out!
1. Understanding Sneaker Design
Sneakers are casual, closed shoes with rubber soles and a stitched or cemented upper, often constructed for both comfort and style. Compared to dress shoes, sneakers typically use softer materials and simpler stitching techniques.
Key Features of a Sneaker:
- Soft, flexible upper (leather, suede, canvas, mesh)
- Cemented or stitched-on rubber cup sole
- Often includes padding, lining, and cushioning
- Can be low-top, mid-top, or high-top
Common Sneaker Styles Include:
-
Minimal Leather Sneakers – Clean, timeless style

-
Retro Athletic Sneakers – Inspired by vintage sportswear

-
Canvas Trainers – Lightweight and casual

-
Cupsole Sneakers – Popular streetwear look

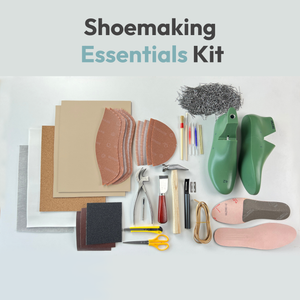
2. Tools and Materials You’ll Need
To make a proper pair of sneakers, you'll need a slightly different set of tools and materials than for dress shoes:
Tools:
-
Lasting pincers

-
Shoemaking hammer

-
Leathercraft tool knife

-
Leather Safety Beveler

-
Hole punch for eyelets

-
Marking pens for leather

-
Iron nails for hand lasting

Materials:
- Leather, suede, canvas, or synthetic upper material
- Soft lining (microfiber, mesh, or leather)
- Foam or cork insole padding
- Rubber cup sole or flat outsole
- Toe puff and heel counter
- Shoelaces, eyelets, and thread
- Strong adhesive for rubber bonding
You can find many of these tools and materials in my shop if you’re looking for professional-grade supplies:
👉 Shoemaking Tools and Materials
3. Creating the Sneaker Pattern

Sneakers often have more components than formal shoes — such as quarters, vamps, tongues, heel tabs, and side panels.
Every great Sneakers shoe starts with a precise and well-crafted pattern. If you're not ready to draft one from scratch, you can use pre-made digital patterns available in all 9 sizes, ready to print on A4 or Letter paper.
👉Pre-made patterns
Alternatively, you can learn how to design your own patterns step by step in my dedicated patternmaking course. By the end, you’ll have the skills to create patterns for any type of shoe.
👉Footwear patternmaking course
Steps:
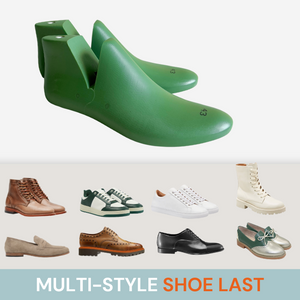
- Choose a sneaker last that matches your foot shape.
- Trace or print the pattern pieces for the upper, lining, and reinforcement layers.
- Add seam allowance and perforation marks for eyelets and stitching lines.
4. Cutting the Upper Materials
Now it’s time to prepare the leather, canvas, or suede for your sneaker upper.
Steps:
- Lay out pattern pieces and trace them on your materials.
- Cut both the outer and lining layers.
- Skive or thin the edges that will be folded or overlapped.
- Punch holes for eyelets and stitch holes (if needed).
- Pre-punch or pre-mark seam allowances to guide stitching.
5. Assembling the Upper

This is where your sneaker takes shape.
Some of the Steps:
- Sew or glue the lining to the upper pieces.
- Stitch the vamp, quarters, and heel together as per your pattern.
- Add tongue padding and eyelet reinforcements.
- Attach the tongue and sew or glue everything in place.
- Insert metal eyelets and finish all edges for a clean look.
6. Lasting the Sneaker Upper

Lasting a sneaker is simpler than a formal shoe but still requires care.
Steps:
- Place the assembled upper onto your last.
- Pull tightly and cement the upper edges to the insole board.
- Use pincers and tacks if needed to maintain shape.
- Let it set and dry fully before attaching the sole.
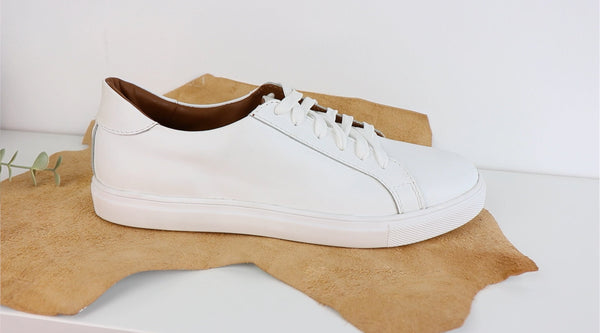
7. Attaching the Sole (Cupsole or Flat)

Most sneakers use rubber cupsoles, which wrap slightly up the sides for added durability and style.
Steps:
- Sand the lasted upper bottom and sole edges for better adhesion.
- Apply adhesive to both surfaces and allow to dry (contact cement technique).
- Carefully press the cupsole onto the lasted upper, starting from the toe and working to the heel.
- Clamp or press firmly and let cure.
- Optionally, stitch the sole edge if your cupsole has a stitch channel.
8. Final Touches and Finishing
This is where your sneakers go from handmade to polished.
Steps:
- Clean and finish edges with sandpaper or a burnishing tool.
- Add removable insoles for comfort.
- Lace up and test for fit.
- Add branding or decorative details (like side embossing or stitching).
👟 Time to Make Your Own Sneakers?
Handmade sneakers give you the chance to combine personal style with practical shoemaking skills. They’re fun to design, durable to wear, and make great gifts — or the foundation of your own shoe brand.
👉 Want to go deeper? Learn how to make sneakers, flats, boots, and more in my full Patternmaking and Shoemaking Online Course